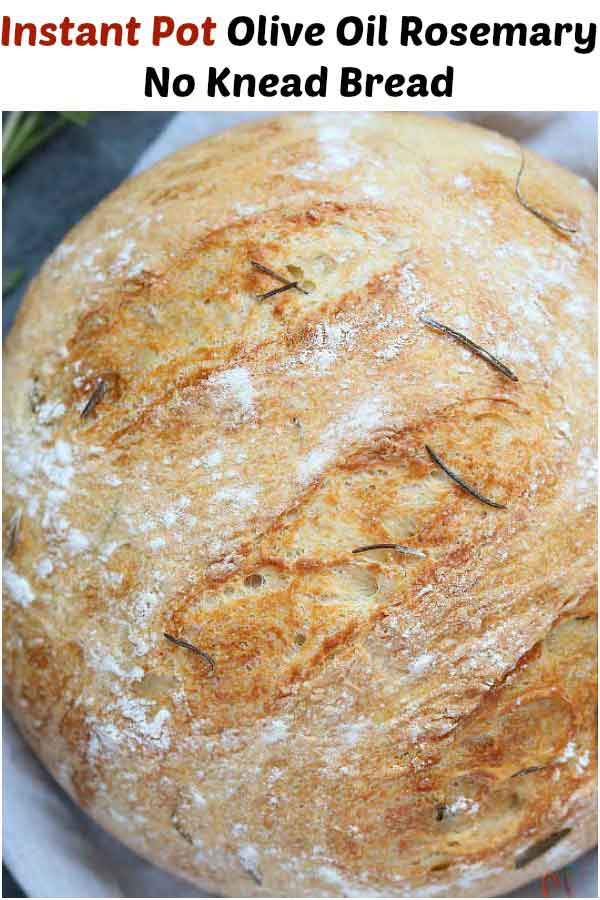
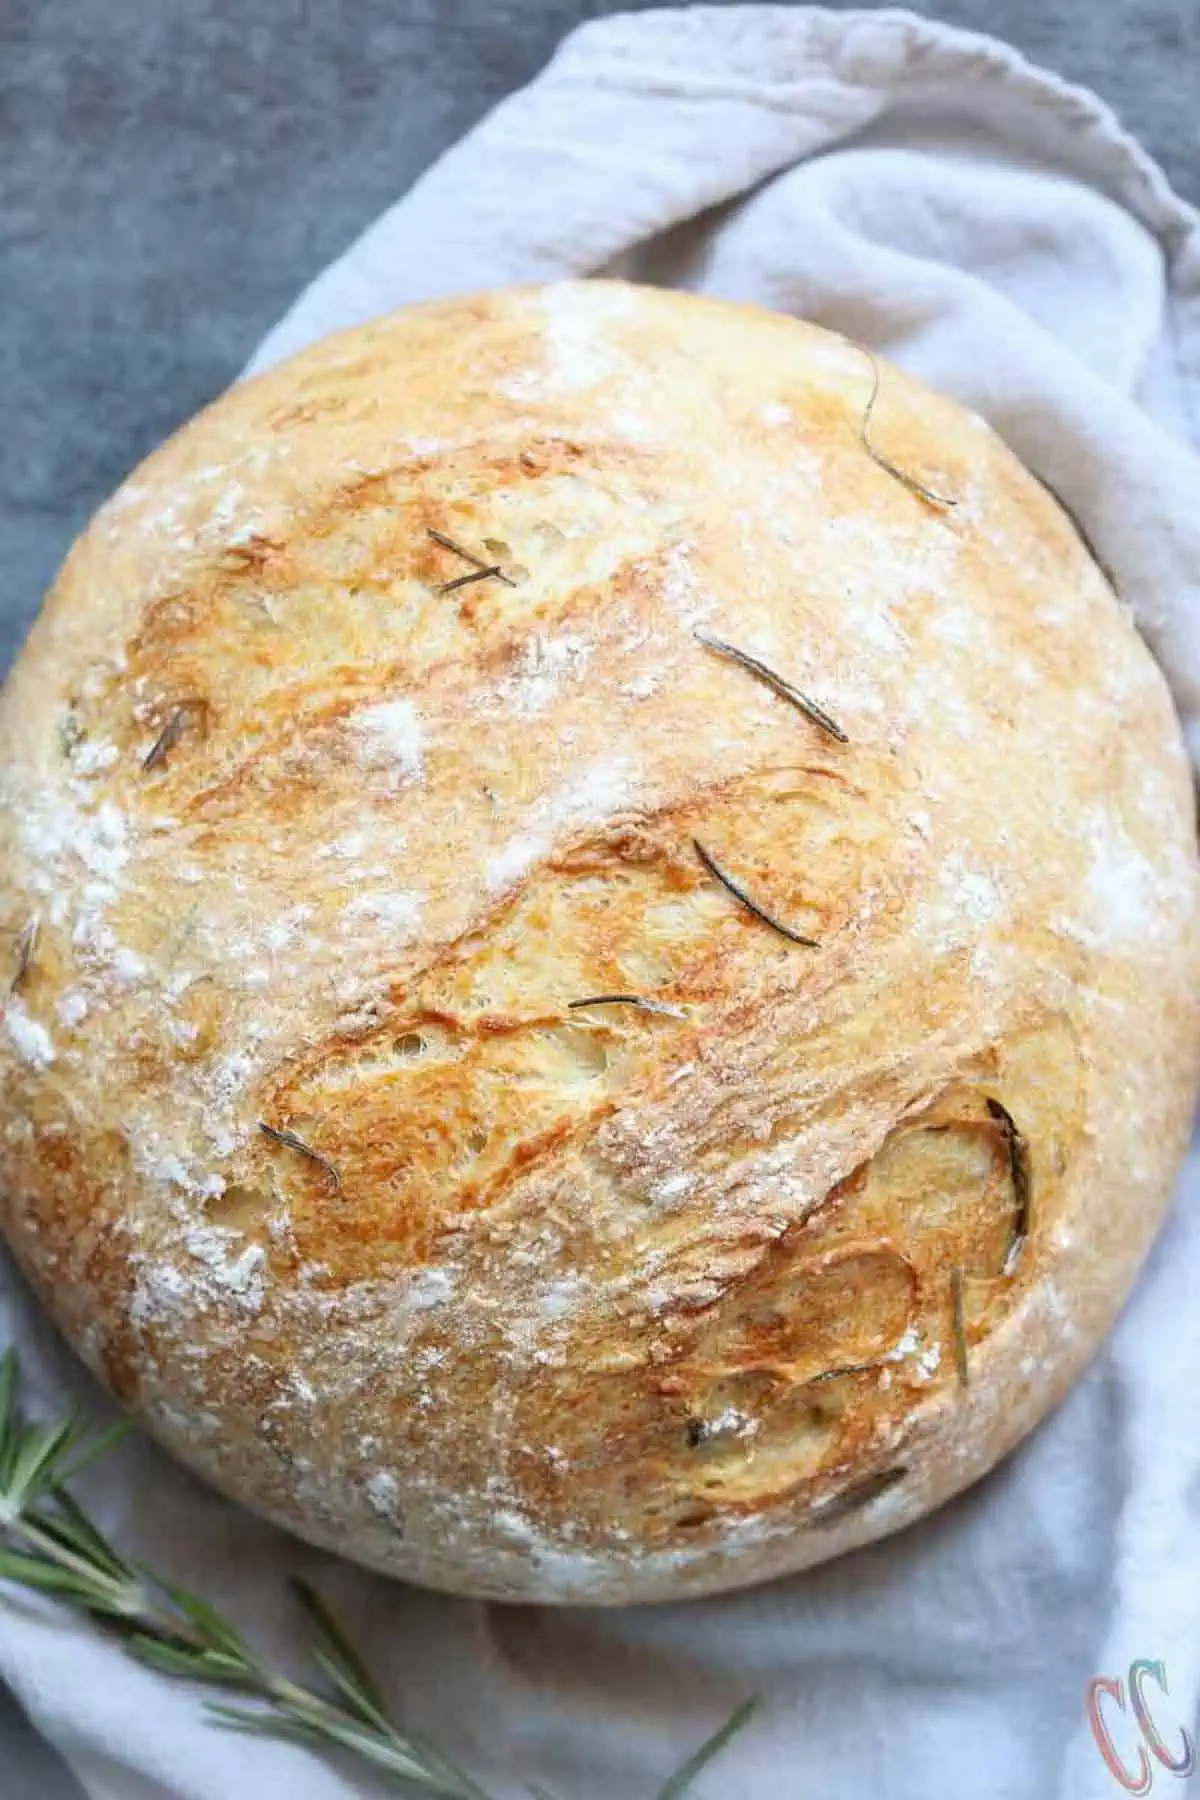
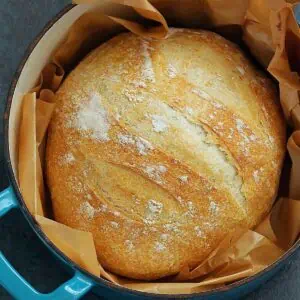
Instant Pot Olive Oil Rosemary No-Knead Bread – One of my favorite versions/variations of making No-Knead Bread for a Holiday Dinner Table Which is Vegan, crusty, and delicious. A Basic, Foolproof, best No-Knead Bread recipe, anyone can make this! It comes out just perfect every time!!
Jump to:
Baking bread around the holidays is great for bringing to any gatherings, giving as a gift, or for the holiday dinner table.
It’s
- Easy
- Simple
- Much cheaper than store-bought
- Very few ingredients
- Full of Rosemary flavors
- And Oh so so tasty!!
My favorite way to eat it is with a warm bowl of soup, with butter or dipped into balsamic vinegar and olive oil.
And from leftover bread, I make different types of sandwiches like
- Caprese Grilled Cheese Sandwich,
- Eggplant Parmesan Sandwich,
- Creamy Beetroot And Sprouts Grilled Sandwich, and
- Veggie Grilled Sandwich.
What is No-Knead Bread?
No-Knead Bread is the simplest kind of bread you can make. You just need to throw everything into a bowl and mix it up, then sit around, let the yeast do its work, and then bake it.
This is bread perfect for beginners. That doesn’t mean who bakes frequently doesn’t love this bread. Everyone loves baking this bread.
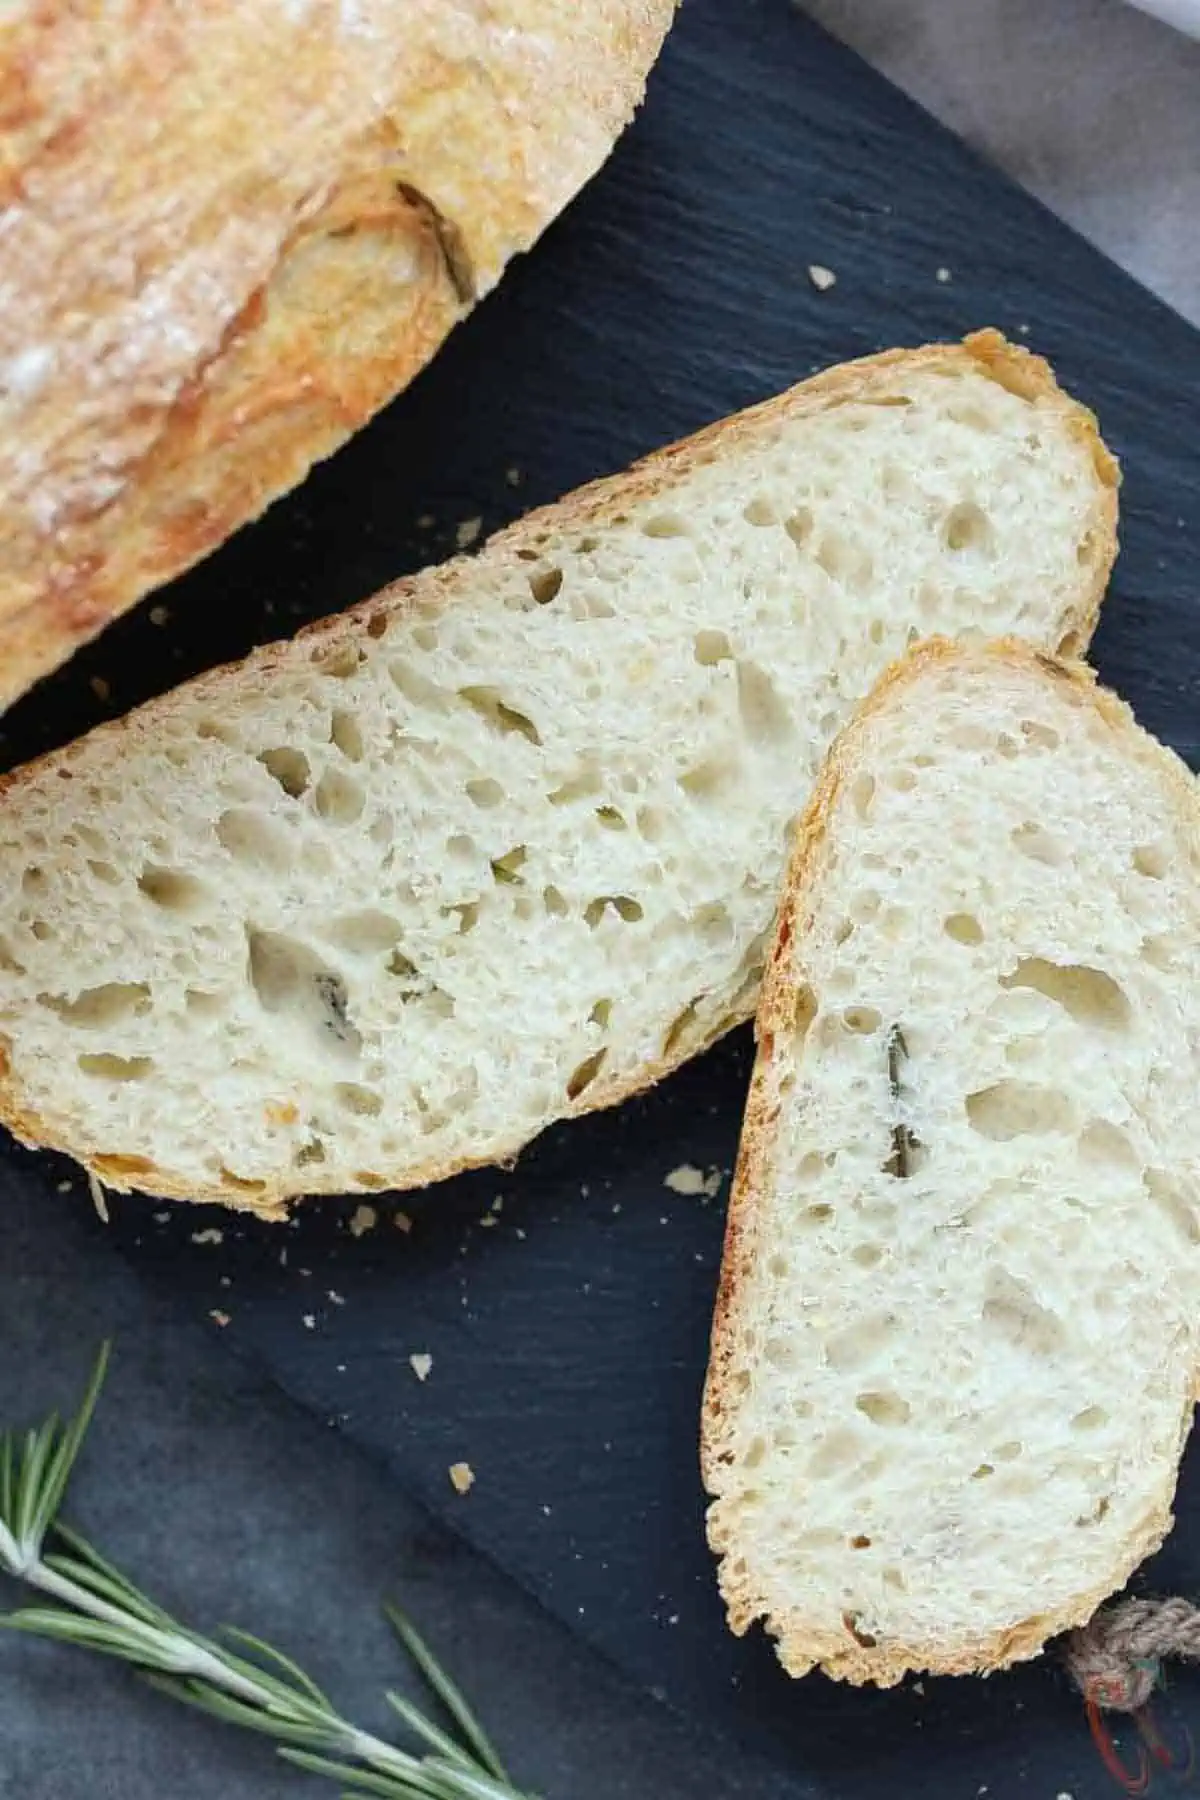
The slow rise method gives this bread lovely flavors and it gives it an awesome crispy crust after baking.
This Quick No-Knead Bread is Artisan Quality bread with very minimal effort, I would say with no effort. :).
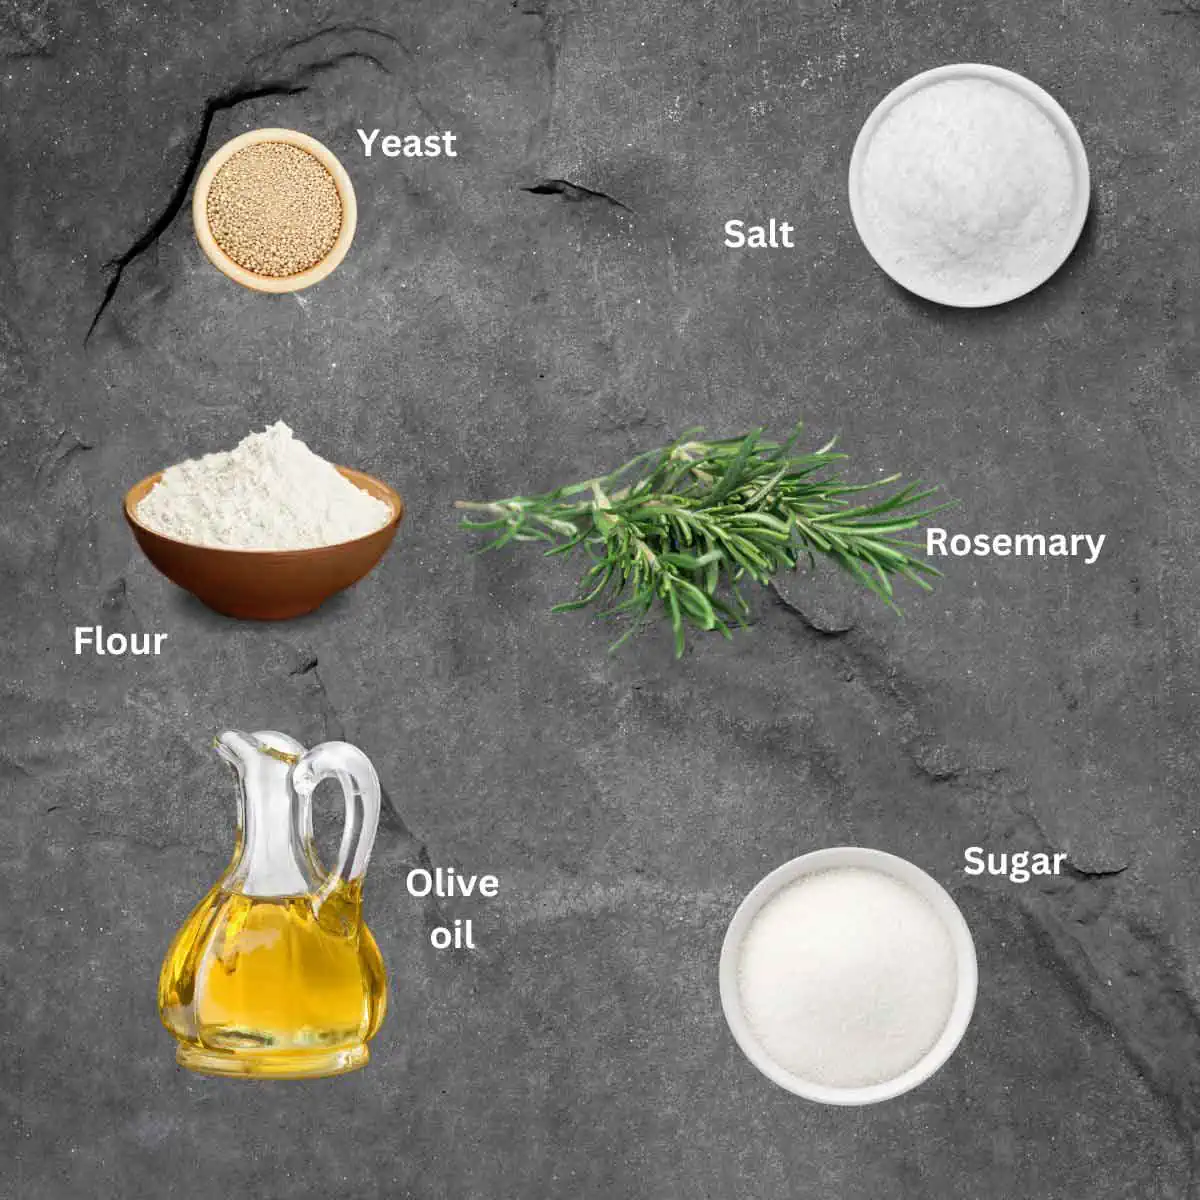
It requires only 4 basic Ingredients.
Ingredients required
Below is the ingredients list and possible substitutions. The exact ingredient amounts are in the printable recipe card at the bottom of this post.
- Bread flour: You can replace bread flour with all-purpose flour.
- Salt: This makes the bread very flavorful.
- Yeast: Active dry yeast and Instant yeast are the best choice for this no knead bread recipe; however, you can use rapid-rise yeast, but you will still need to let it rise overnight.
- Sugar: to activate the yeast.
- Olive oil: I like the deeper olive oil flavor so I have used Extra virgin Olive Oil in the bread.
- Rosemary: For the flavor. Rosemary is a perfect winter herb and my favorite. I love its pungent aroma. You can use any herbs or add-ins of your choice. I have shared some ideas above the recipe card. So remember to check that out.
- Water: Make sure to use warm water (105 degrees). It should feel warm to the touch but not hot.
I have shared here No-Knead Bread recipe last year. Why I am sharing this again?
The reason behind this is Instant pot and I have added some flavors(in form of herb).
What so important about proofing the Bread dough in Instant Pot?
We love crusty bread. It goes so well with any soup like vegetable soup, Instant Pot Lasagna Soup, Lasagna Soup, Spinach Soup, Instant Pot Carrot soup or Thai noodles soup.
No-knead bread takes a long time to rise, around 18 hours. That’s the hardest part when you don’t have enough time.
But thanks to Instant Pot. It changed my life. The method of making bread in Instant Pot is a lot easier and a lot faster.
Proofing the Bread in Instant Pot is the perfect solution for baking No-Knead bread in Winters. Now, I can enjoy Homemade crusty bread very often than before.
Important Note For Instant Pot Bread –
Your Instant Pot must have a yogurt function in order to be used in this recipe. It provides the ideal temperature required for the bread dough to rise.
With the help of Instant Pot, the bread dough will rise in just 4 hours. You don’t need to wait for 18 to 24 hours. Win… Win…!!
How to make Instant Pot Bread | No-Knead Bread?
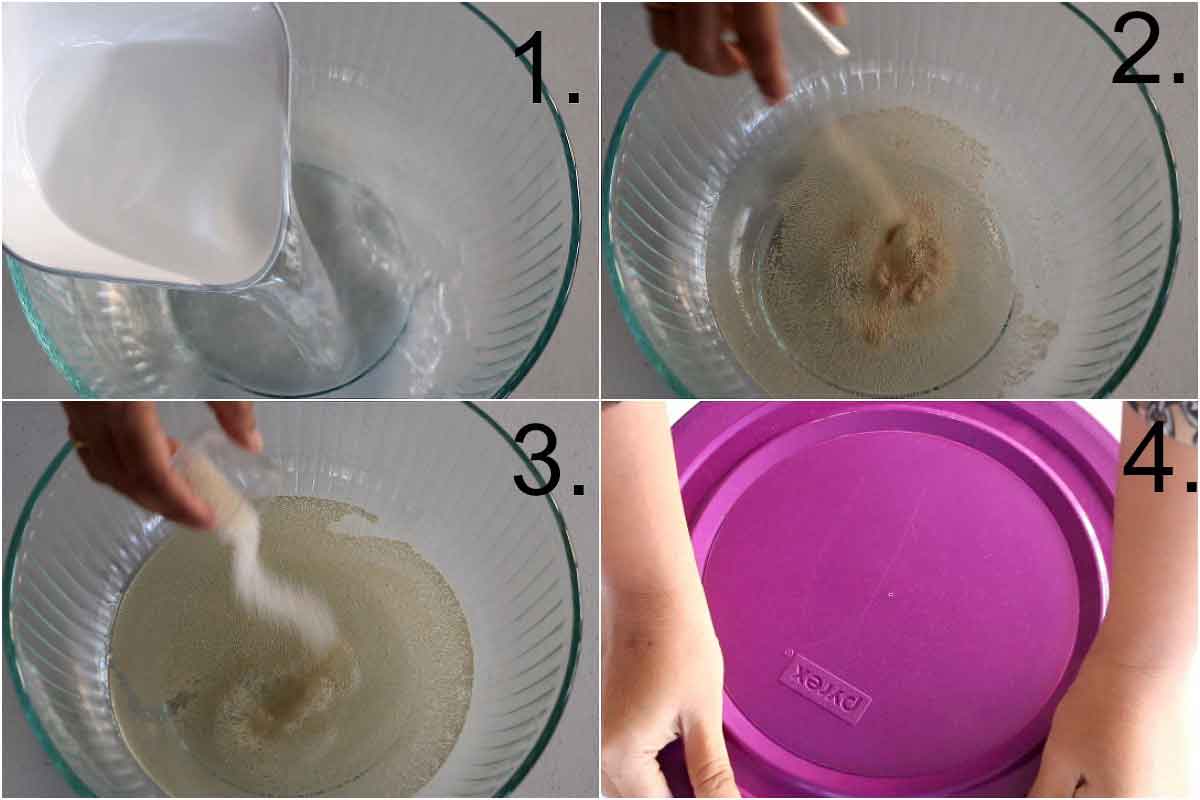
- Take Luke warm water in a large bowl, add sugar and yeast. Stir once, cover it and let it rest for 10 minutes. After 10 minutes, the yeast water should look frothy. (photo 1 to 4)
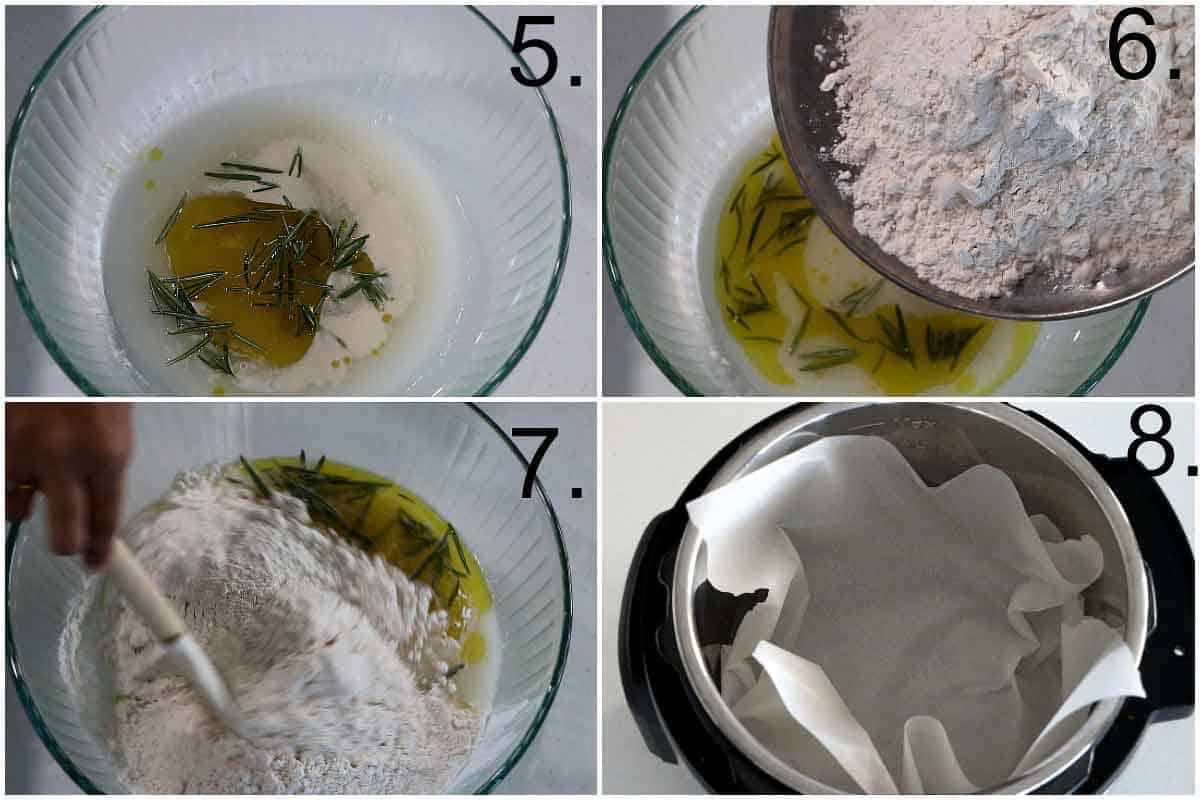
- Now add oil, rosemary, salt, and flour. Give it a quick stir until blended and all the flour is incorporated. The dough will be rough, shaggy and sticky. (Photo 5 to 7)
- Line the bottom of the instant pot bowl with parchment up the sides. Spray parchment with oil. photo 8)
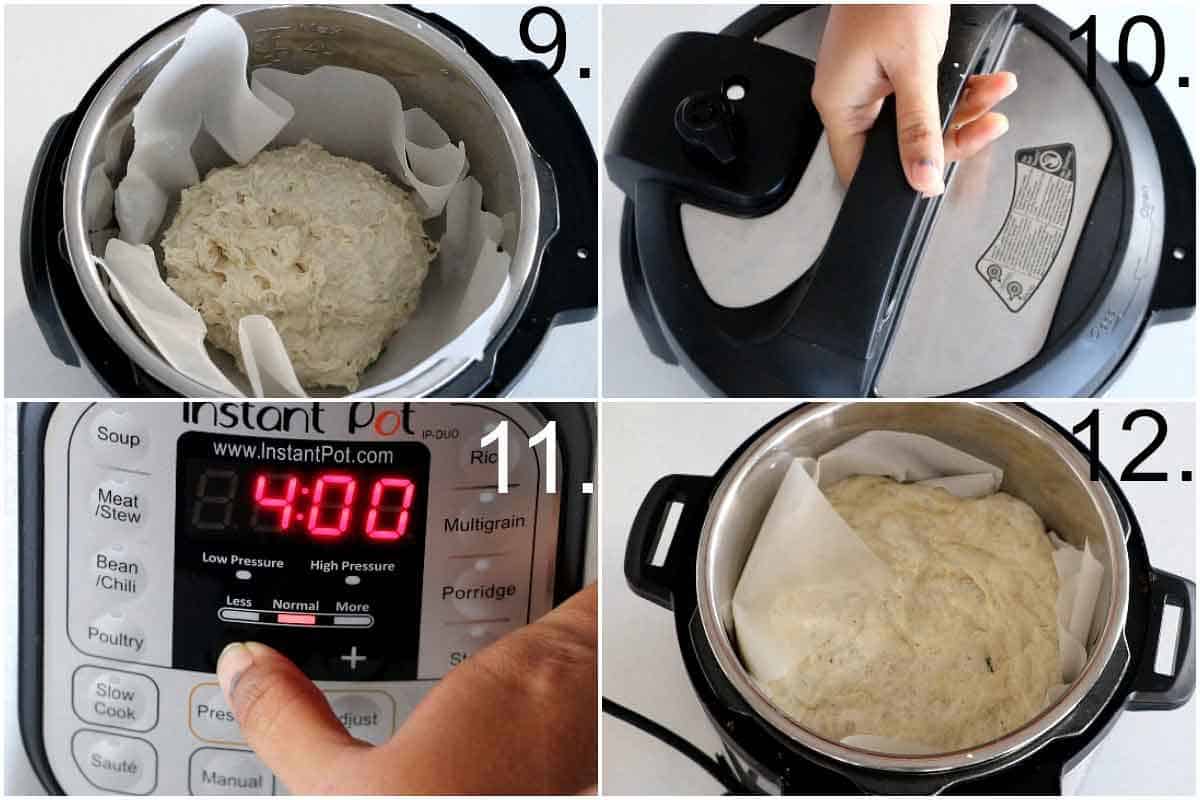
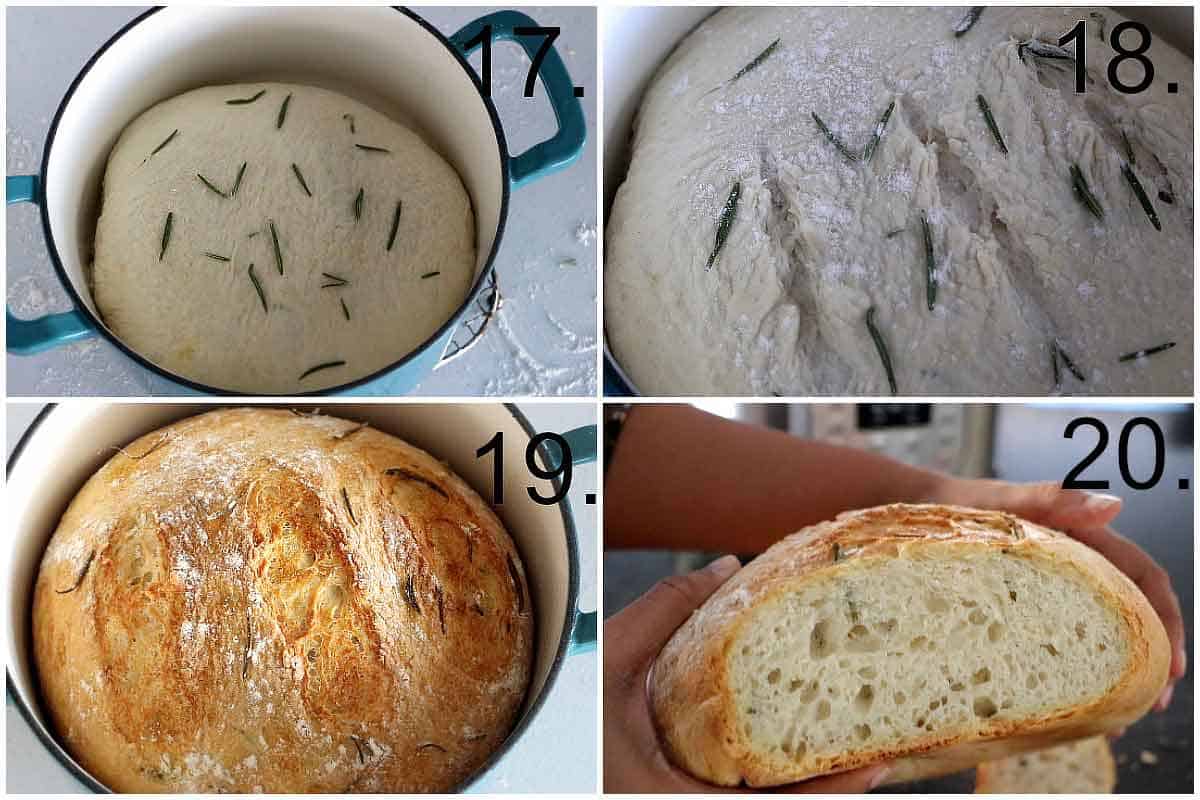
- Place the dough in the prepared pot, close the lid and press the yogurt button on the Normal Setting. Set the time for 4 Hours. After 4 hours you will notice the dough is dotted with bubbles and has risen more than double in size. (Photo 9 to 12)
- Preheat oven @450 degree F. Place a Dutch oven (I used 3.5-quart size) in the oven to preheat it as well.
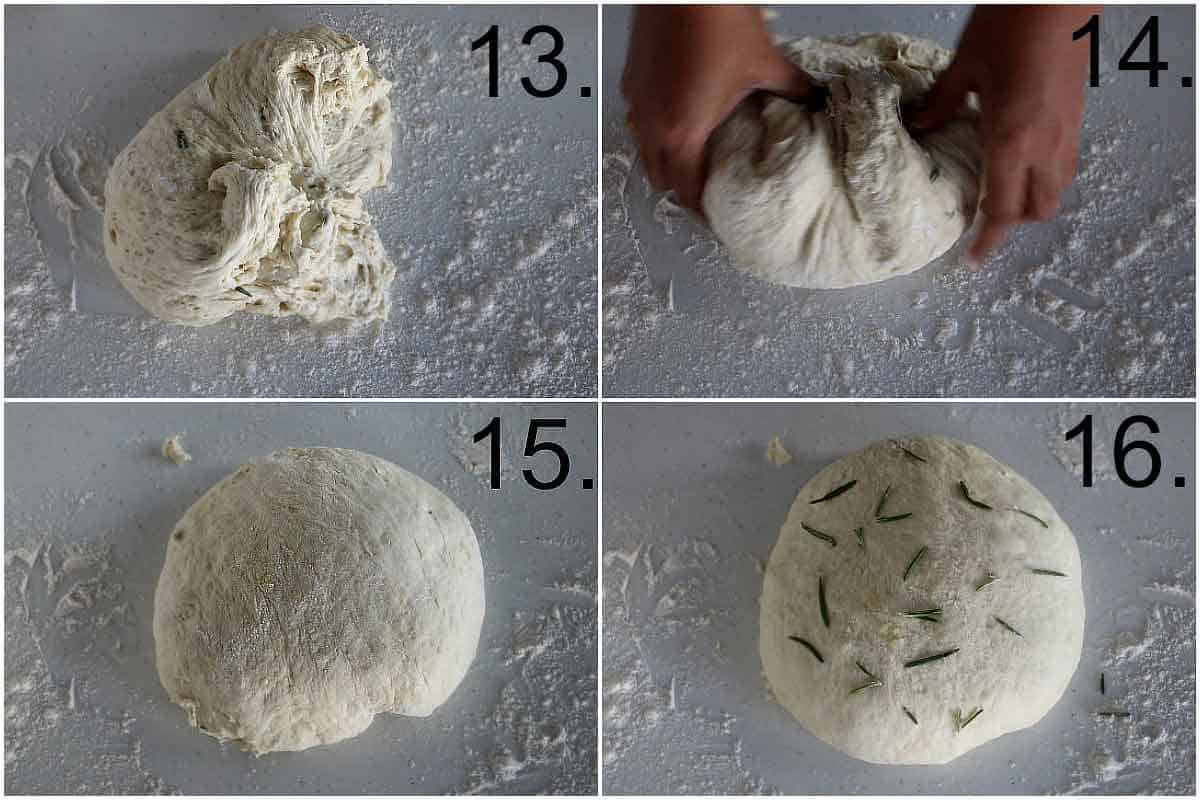
- Scatter some flour on another piece of parchment paper, remove the dough from instant pot and parchment paper(the one we used in instant pot) and flip the dough onto the floured Parchment paper. Shape the dough on parchment paper into a tight ball. (I forgot to use the parchment paper). Shaping the dough into a round tight loaf on a parchment paper makes it easier to place the bread in Dutch oven and take out the bread from the Dutch Oven.
- Sprinkle some Rosemary on the dough, cover it with a towel for about 30 minutes.
- Now carefully remove the hot Dutch oven from the oven. Remove the lid and Gently put the dough ball into the Dutch oven.
- Sprinkle a light coating of flour over the top.
- Take a sharp knife and slash the bread 2 to 3 times, making a cut about ½ inch deep. You can skip this step as well.
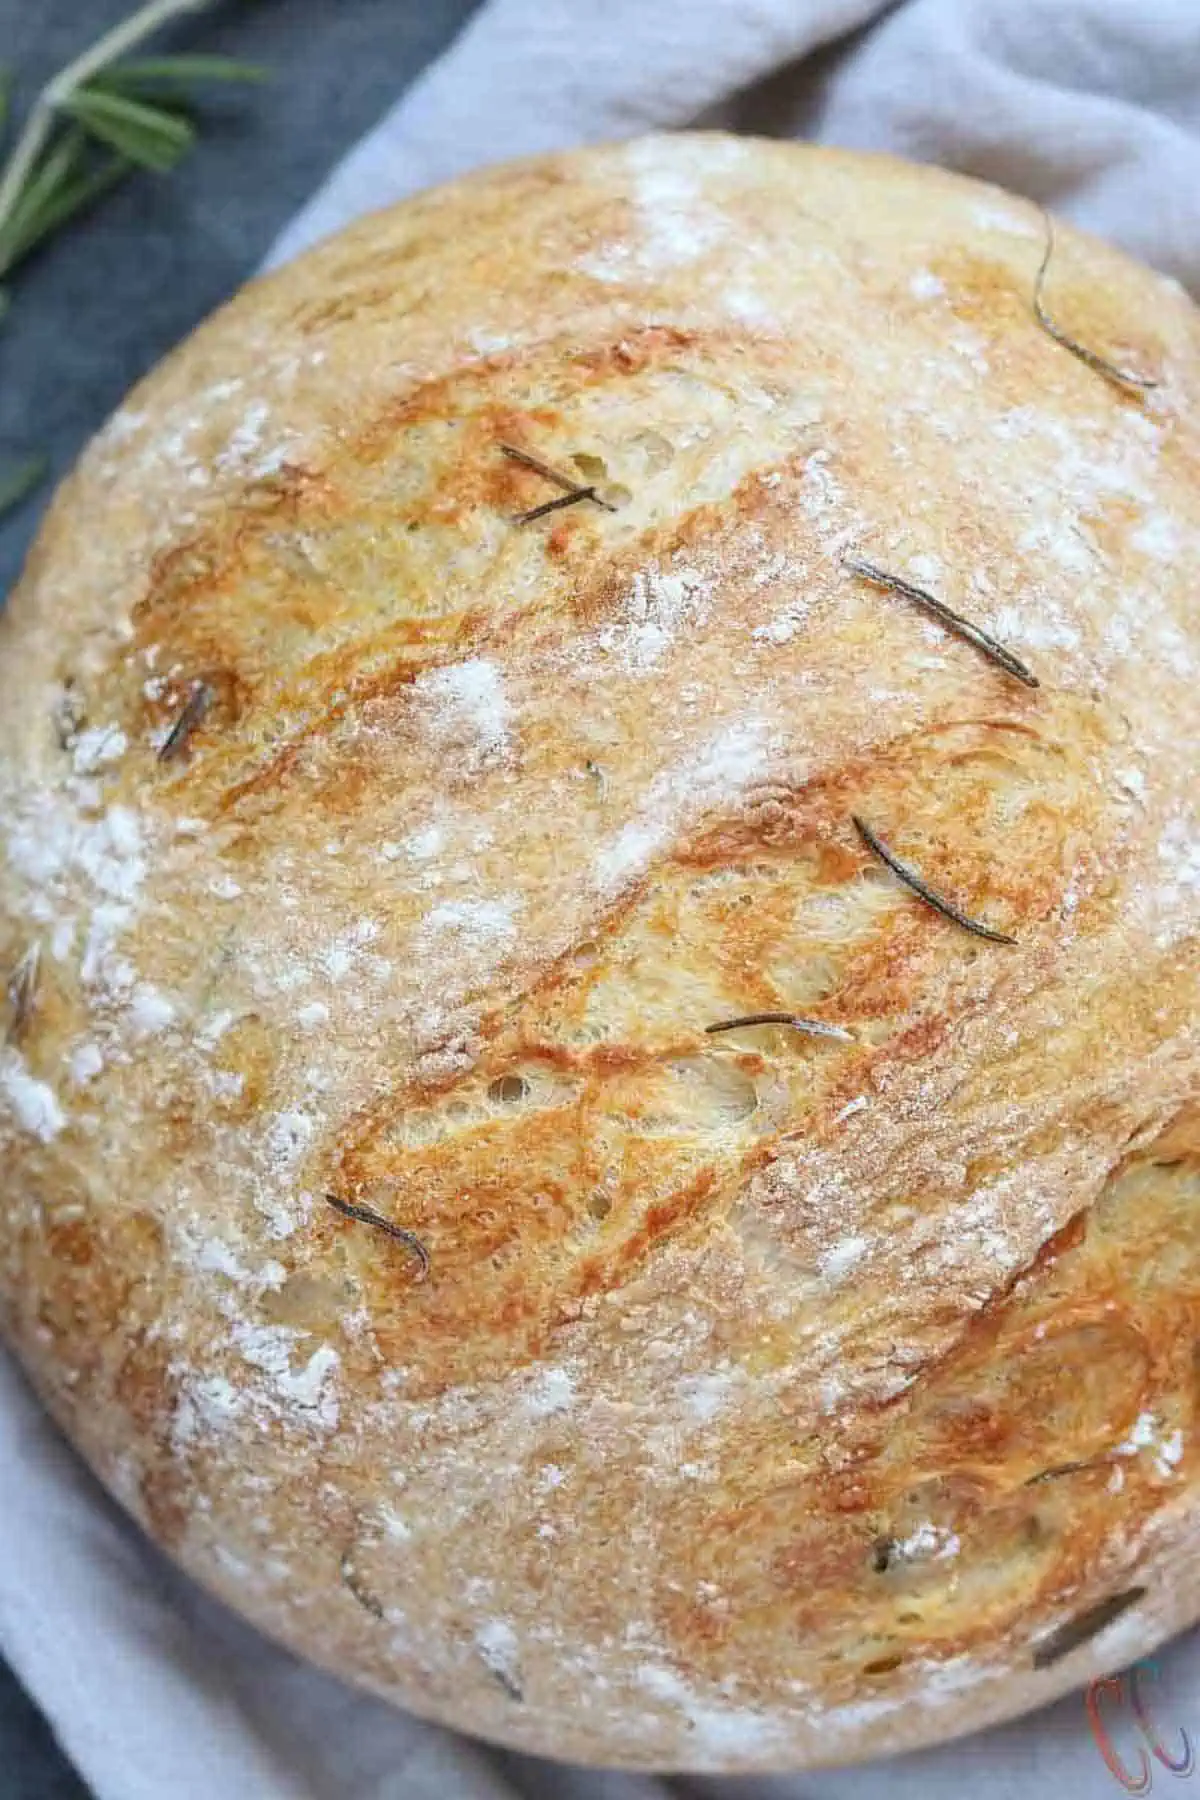
- Put the lid on and pop it in the oven for 40 to 45 minutes @450 degree F, on the middle rack. After 30 minutes remove the lid and bake for 15 minutes without a lid. (30 minutes lid on and 15 minutes without lid, total 45 minutes).
- Remove the loaf and let it cool on a rack before slicing. to keep it warm, cover with a towel.
- Enjoy it with Butter!
Tips and notes
- Use bread flour for the best result.
- Check the expiration of Active dry yeast.
- Check the water temperature before adding the yeast. Perfect water temperature is 110 to 115.
- Use fresh rosemary.
- I like the deeper olive oil flavor so I have used Extra virgin Olive Oil in the bread.
- Flour-water ratio – Depending on how you measure the flour, quality of flour and how dry the weather is, you may need to add/less water to bring the dough the right wet and sticky consistency. If your dough is dry after you mix it, add water by the tablespoon until it feels perfect.
- Make a wet shaggy dough.
- Give the dough a proper warm temperature to rise
- Shape the dough on parchment paper into a tight ball. I forgot to use the parchment paper. Shaping the dough into a round tight loaf on a parchment paper makes it easier to add and take out the bread from the Dutch Oven.
- Slashing the dough – I do prefer to make a cut in the dough. Use a sharp knife and gentle pressure. (Refer a Video in recipe card).
- Bake No-Knead Bread in a Dutch oven. Dutch Ovens hold heat well and keep the steam created by the bread inside the pot for a crisper crust and texture.
- Adjust the Oven temperature – Depending on your oven, you may need to adjust the temperature. I bake my no-knead bread @450 degree F.
- Don’t add all the yeast mixed water at a time. Add slowly as needed. Because as I said, Flour-water ratio always depends on many factors.
- Instant Pot Bread Dough can be proofed in 3qt, 6qt, and 8qt.
- When I posted this recipe, I have used IP lid to cover the dough. Now I do want to make a note on this you wouldn’t use the IP lid for proofing the dough. Because If you let it rise too much it can push the pin up to lock the id and you may not be able to get it open. So Instead of using IP locking lid use either glass lid or plate. Its much better choice.
- You can use Half All-Purpose Flour and Half Whole Wheat flour too instead of only all-purpose flour.
- You may also make this no-knead bread with Gluten-free Flour.
Quick FAQs
The answer to the question is to use a candy thermometer or Finger test. Insert a clean finger in the water count 1 to 30. You should be able to leave your finger in the water.
Use covered metal pot – The metal pot should have a cover and should have an ability to stand up to 500 degrees F heat.
Pot covered with foil – If you don’t have lids for your pots, cut a square of heavy-duty aluminum foil and seal the pot after placing the dough.
Oven safe Casserole Dish works fine as well. Just read the instruction and make sure it’s safe up to 500 degrees F. temperatures.
No-Knead Bread Requires 4 basic Ingredients. But you can add flavors of your choice too. There are many variations you can try. Some of my favorites are –
Olives,
Herbs,
Roasted Garlic,
Basil and Pine nuts
Jalapeno and Cheddar Cheese
Walnuts and Chocolate Chips
Caramelized Onions,
Four cheese,
Cranberry,
Rosemary,
Olive oil,
Cranberry and pecan bread, etc.

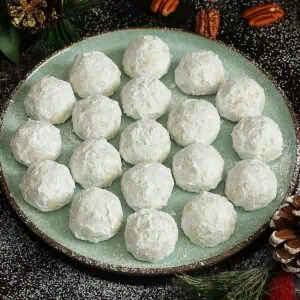
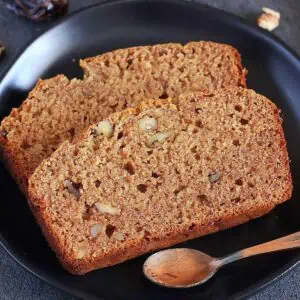
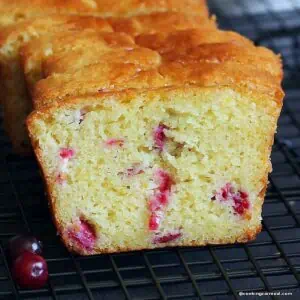
More Holiday Bread recipe ideas
Have you tried this Recipe? Please feed us with your feedback, ★ star ratings, and comments below.
You can also FOLLOW me on FACEBOOK, INSTAGRAM, and PINTEREST for more fabulous recipes and updates.
Subscribe to our YouTube Channel for tasty and easy video recipes.
Instant Pot Olive Oil Rosemary No Knead Bread
Ingredients
- 3 cups – Bread Flour
- 1 ¼ teaspoon – Active Dry Yeast
- 1 ¼ teaspoon – Salt
- 1 teaspoon – Sugar
- 1 ½ cup – Lukewarm water You may need 1 – 2 tablespoon extra to get perfect shaggy dough
- 2 tablespoon – Fresh Rosemary plus for garnishing
- ¼ cup – Extra Virgin Olive oil
Instructions
- Take Luke warm water in a large bowl, add sugar and yeast. Stir once, cover it and let it rest for 10 minutes. After 10 minutes, the yeast water should look frothy.
- Now take flour, oil, rosemary and salt in a big bowl. Mix well. Add yeast water little at a time. You may not require all the yeast water, depending on the quality of the flour. So I highly recommend, add water slowly. GIve it a quick stir until blended and all the flour is incorporated. The dough should be rough, shaggy and sticky.
- Line the bottom of the instant pot bowl with parchment up the sides. Spray parchment with oil.
- Place the dough in the prepared pot, close the lid and press the yogurt button on the Normal Setting. Set the time for 4 Hours. After 4 hours you will notice the dough is dotted with bubbles and has risen more than double in size.
- Preheat oven @450 degree F. Place a Dutch oven (I used 3.5-quart size) in the oven to preheat it as well.
- Scatter some flour on another piece of parchment paper, remove the dough from an instant pot and parchment paper(the one we used in instant pot) and flip the dough onto the floured Parchment paper. Shape the dough on parchment paper into a tight ball. (I forgot to use the parchment paper). Shaping the dough into a round tight loaf on a parchment paper makes it easier to place the bread in the Dutch oven and take out the bread from the Dutch Oven.
- Sprinkle some Rosemary on the dough, Cover it with a towel for about 30 minutes.
- Now carefully remove the hot Dutch oven from the oven. Remove the lid and Gently put the dough ball into the Dutch oven.
- Sprinkle a light coating of flour over the top.
- Take a sharp knife and slash the bread 2 to 3 times, making a cut about ½ inch deep. You can skip this step as well.
- Put the lid on and pop it in the oven for 30 minutes. After that remove the lid and bake it 10 to 15 minutes more without lid @450 degree F, on the middle rack. (30 minutes lid on and 10 to 15 minute without the lid, total 40 to 45 minutes).
- Remove the loaf and let it cool on a rack before slicing. to keep it warm, cover with a towel.
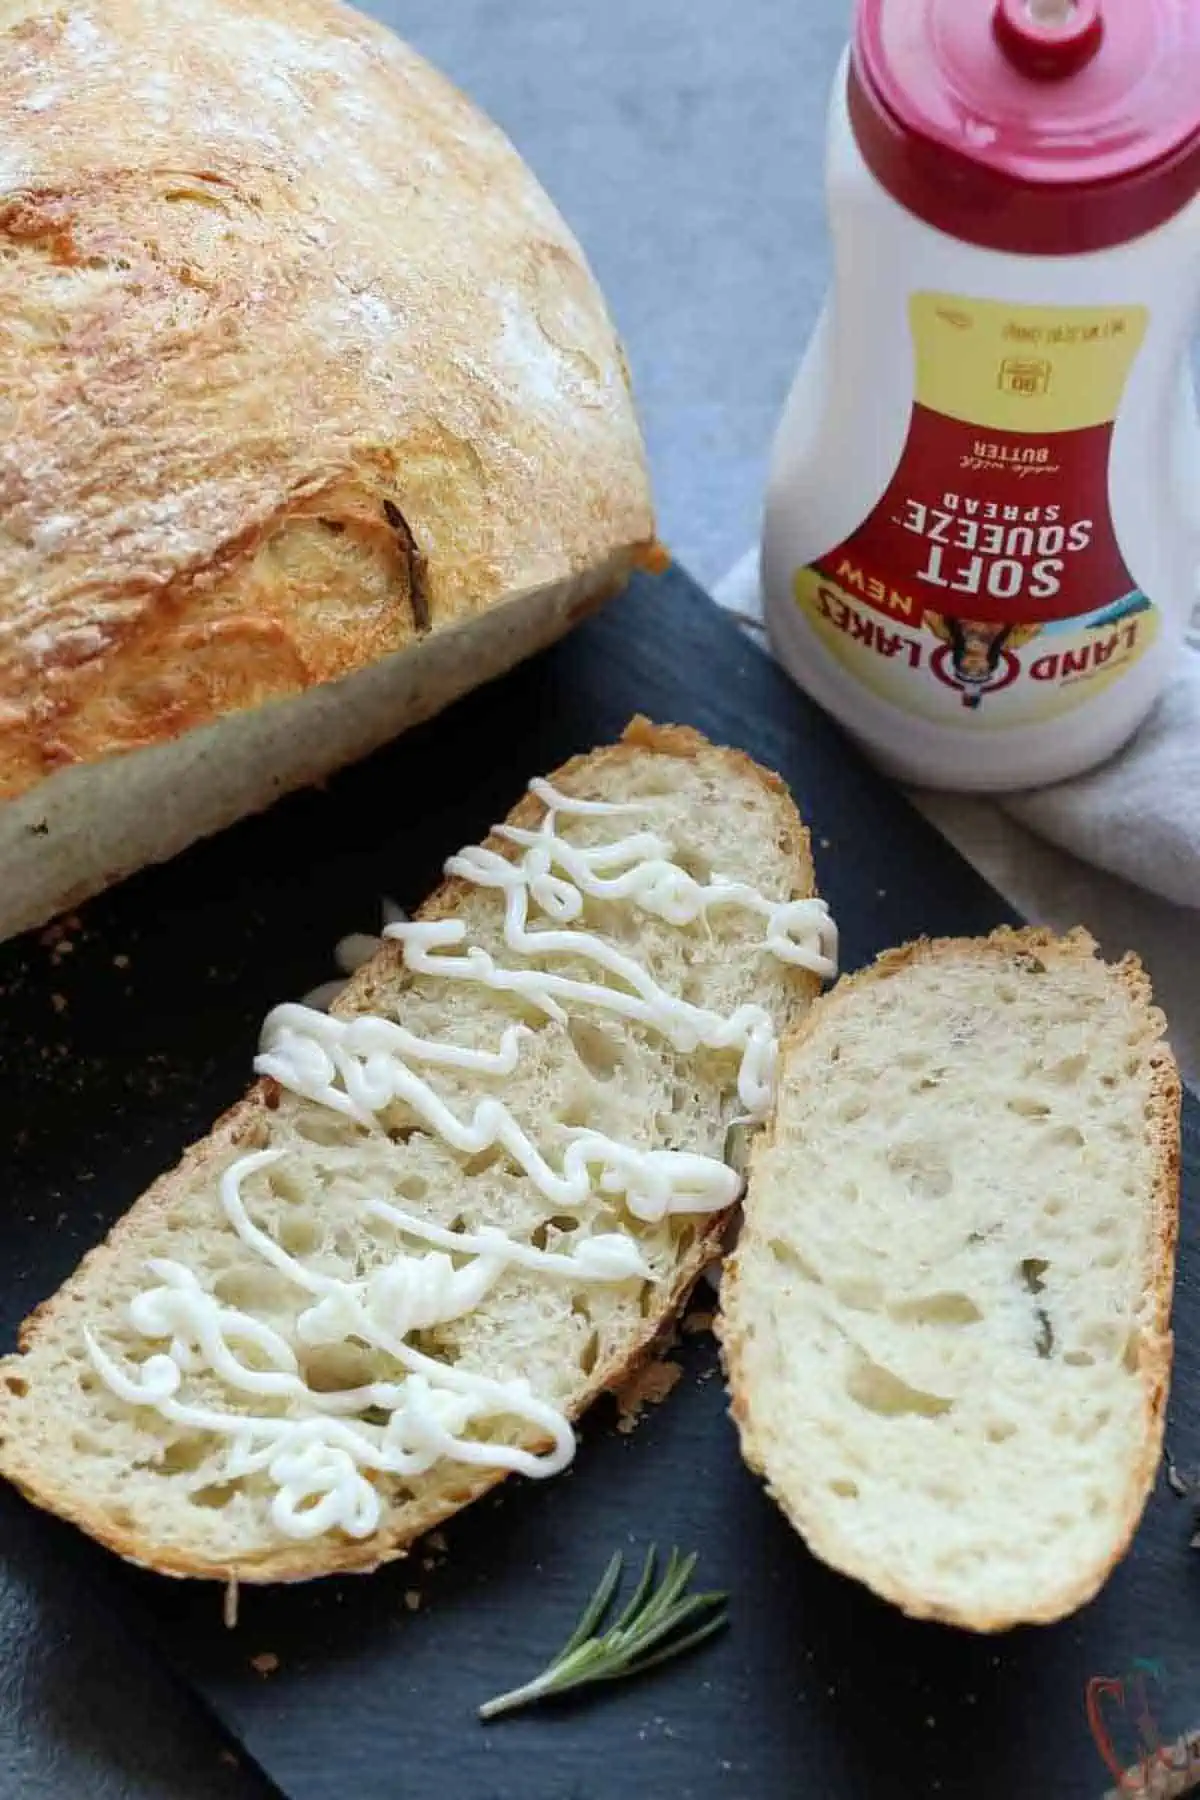
- Enjoy Instant Pot Olive Oil Rosemary No Knead Bread with NEW Land O Lakes® Soft Squeeze™ Spread and soup!!
Video
Notes
- You can still make this bread if you don’t have an Instant Pot. But you must let the dough for 18 hours in a warm place. The rest of the recipe will be the same.
- Use bread flour for the best result.
- Check the expiration of Active dry yeast.
- Check the water temperature before adding the yeast. The perfect water temperature is 110 to 115.
- The answer is to use a candy thermometer or Finger test. Insert a clean finger in the water; count 1 to 30. You should be able to leave your finger in the water.
- Use fresh rosemary.
- I like the deeper olive oil flavor, so I have used Extra virgin Olive Oil in the bread.
- Flour-water ratio – Depending on how you measure the flour, the quality of the flour, and how dry the weather is, you may need to add/less water to bring the dough to the right wet and sticky consistency. If your dough is dry after you mix it, add water by the tablespoon until it feels perfect.
- Make a wet, shaggy dough.
- Give the dough a proper warm temperature to rise
- Shape the dough on parchment paper into a tight ball. I forgot to use the parchment paper. Shaping the dough into a round, tight loaf on parchment paper makes adding and taking out the bread from the Dutch Oven easier.
- Slashing the dough – I prefer to cut the dough. Use a sharp knife and gentle pressure. (Refer to a Video in the recipe card).
- Bake No-Knead Bread in a Dutch oven. Dutch Ovens hold heat well and keep the steam created by the bread inside the pot for a crisper crust and texture.
- Adjust the Oven temperature – Depending on your oven, you may need to adjust the temperature. I bake my no-knead bread at @450 degrees F.
- Don’t add all the yeast mixed with water at a time. Add slowly as needed. Because as I said, the flour-water ratio always depends on many factors.
- Instant Pot Bread Dough can be proofed in 3qt, 6qt, and 8qt.
- When I posted this recipe, I used an IP lid to cover the dough. I want to note this: you wouldn’t use the IP lid to proof the dough. If you let it rise too much it can push the pin up to lock the id and you may not be able to get it open. So, Instead of using an IP locking lid, use either a glass lid or a plate. It’s a much better choice.
- You can use Half All-Purpose Flour and Half Whole Wheat flour instead of all-purpose flour.
- You may also make this no-knead bread with Gluten-free Flour.
- I have re-arranged the step number 2. Instead of adding flour to the yeast water, add yeast water to the flour mixture. So that you can control the hydration (water-to-flour ratio).
You can make bread without a Dutch oven, too.
-
- Use covered metal pot – The metal pot should have a cover and can stand up to 500 degrees F heat.
- Pot covered with foil – If you don’t have lids for your pots, cut a square of heavy-duty aluminum foil and seal the pot after placing the dough.
- Oven safe Casserole Dish works fine as well. Just read the instructions and make sure it’s safe up to 500 degrees F. temperatures.
So Add-ons | Variations
- Olives,
- Herbs,
- Roasted Garlic,
- Jalapeno and Cheddar Cheese
- Basil and Pine nuts
- Walnuts and Chocolate Chips
- Caramelized Onions,
- Four cheeses,
- Cranberry,
- Rosemary,
- Olive oil,
- Cranberry and pecan bread, etc.
Nutrition
Warm Regards,
Dhwani.

If I use garlic powder about how much would I add? Thank you!
Hi Jane,
First of all Happy New Year!
If you want to use garlic powder, 1 tsp is enough. FYI, if you are going to use GARLIC SALT, make sure not to add extra salt. Hope this helps. 🙂
Can you double this using an 8 at instapot?
Yes, you can. But cover the IP with a glass lid or plate. 🙂
What IP setting would you use if you do not have a Yogurt setting?
Hi Jorie!
Unfortunately, you can not prove the dough if you don’t have a yogurt function in your IP. You can keep the dough for fermentation on the countertop for 18 hours.
I just got an Instant Pot and this is the second recipe I’ve made it it. I made the dough, transferred it to the pot, and then realized mine doesn’t have a yogurt setting. Instead, I used the Sous Vide setting on 105F and it worked great!!
what Happens if I take it out at 3 1/2 hours?
Hi Ashley!
To get the perfect and great texture, more proofing is better.
Do you grease the Dutch oven before you put the dough in it?
No. You dont need to.
I don’t often leave reviews on recipes but this definitely deserves one. This bread is incredible. Made it exactly as directed and it turned out perfectly. Thank you for sharing!
Awww… Sarah!
I am so glad to know that it comes out perfect for you. I appreciate your feedback. 🙂 Thanks.
Running into an issue with my first attempt, followed all of the steps, removed from pot onto parchment paper and flour, trying to shape into a ball, super sticky and malleable making it difficult to form into a tight ball. How much additional flower will be added to make it not sticky so I can shape it?
Hi Erik!
Up to 1/4 cup of flour can be added. Dont worry that much about perfect shape.
Hi! Two questions- any changes suggested for Hugh altitude? Also, would a cast iron Dutch oven work? Thanks in advance!
Hi Wendy!
1. No change needed.
2. Yes, the cast iron dutch oven would work perfectly fine.
You said its fine to use half wheatflour and half all purpose flour. Didyou mean half bread flour and half wheat flour?
Yes, Mamta. Half whole wheat flour and half bread flour. Sorry for the confusion.
Do I slide the dough ball along with the parchment into Dutch oven and bake on the paper?
Yes, Jody!
In the video, it doesn’t show you putting the dough and parchment paper in the dutch oven to bake? I’m a little confused. Can you clarify please?
Hi Theresa! As mentioned in the description, I forgot to use the parchment paper at the time of video shooting. Hope this helps. 🙂
I didn’t see that. Thanks!
Don’t you need to pre-heat the Dutch Oven prior to putting the raw dough into it?
Yes!. It is mentioned in the recipe already.
Delicious and so easy!! I love to cook (but don’t “bake” much) and I couldn’t believe how well this turned out. It looked just like the pictures. Could you please provide the Four Cheese version? I’ve decided I’m not as much of a rosemary/olive oil person as I thought I was…even though it turned out yummy. 😁
Hi Laurie!
Thanks for the feedback, dear. I am so glad to know that this turned well. 🙂
For four cheese, just add 1 cup of four cheese before second proofing and shape the dough into round. Hope this helps.
I want to make the basil and pine nut variation. I’m assuming I will still add the olive oil and substitute the rosemary with fresh or dried basil. Do I use roasted or fresh pine nuts and when do I add them in?
Hi Michelle,
Make with roasted pine nuts. And add before second proofing. Hope this helps. 🙂
Add cheese at second proofing? I don-t see in the directions a second proofing. When would you add cheese?
Can you use wax paper instead of parchment during the proofing step since it’s not baking.
Thanks!
Yes, you can.
Thanks!!
Can I shape the dough into long, narrow loaves on a parchment-lined cookie sheet (to use for a bruschetta recipe) or does it have to be baked in a Dutch oven?
Hi,
Yes, you can do that. You just need to look for baking timings. Check it after 20 minutes.
My bread was slightly dense even though I followed all the steps. Did it need to rise longer?
Hi Krupa!
How was the dough? Wet or dry? The reason could be hydration. Your dough wasn’t well hydrated.
The dough seemed slightly more hydrated then yours did. Also when setting the knob on top of the instant pot when using the yogurt setting do you use the venting setting or sealing setting?
Hi Krupa,
1. As mentioned in the notes, Depending on how you measure the flour, quality of flour and how dry the weather is, you may need to add/less water to bring the dough the right wet and sticky consistency. So from next time add water mixture little at a time.
2. It doesn’t matter knob on venting or sealing position.
Any way to do this with all whole wheat all purpose flour and no bread flour?
Hi Carina,
Yes, you can take half all-purpose and half whole wheat flour. Make sure the dough is well hydrated.
If i want to test the add-ins, is there a certain amount i should use? IE: Cranberry and walnut. Can i assume 1 cup is enough? too much?
Hi, sue,
Yes, I would start with 1 cup.
Is this possible with just all-purpose flour? that’s all I have right now.
Yes, Karen. You can use only all-purpose flour.
I used self rising flour, thinking it was bread flour. Did I totally screw up? And the dough was still kinda wet, even mixing in some extra flour. Will it be ok?
Hi, Lisa.
Yes, self-rising flour is totally different and can not be used to make this bread recipe.
I used all purpose flour and let it rise 4 hours on yougurt setting – but I have a tiny, tiny loaf. I noticed my yeast was quick rise (all I had) is this my problem?
It could be.
So looks like there’s no bread flour available for us. Can I use regular flour?
Hi Erin!
Yes, you can use regular flour. 🙂
My IP yogurt settings has low, medium and high. Do you know which one is “normal” or what the temp should be? Thanks!
Hi Erin,
Medium is the Normal one.
I don’t have olive oil on hand. What other oils would be a good substitute? I have avocado oil and grape seed….
Hi, You can use Avocado oil.
I made this. Turned out good. Just that last 10-15 min bake was too much and it overcooked the outer crust.
Anywaz my question is how do I store it?
Hi shilpi!.
Glad to know it come out well. Baking time really depends on the oven to oven.
For storing, place it in ziplock bag and store at room temperature up to 3 days or up to a week in fridge.
I am OBSESSED with the rosemary and olive oil bred. It almost lasted 24 hours between my roommate and I.
I would love to do a jalapeño and cheddar one. How much cheddar and jalapeño should I use? Also do I still need to put the olive oil in?
Thank you so much! It was my first time making bread and it turned out awesome!
So happy to know! 🙂 Thank you!
For Jalapeno cheddar bread, use 2 to 3 tbsp chopped jalapenos and 1 cup of cheese.
Yes, add olive oil too for the crispy crust.
Hope this helps! 🙂
Awesome thank you!!! Would I add the toppings into the second proof?
Yes. 🙂
Any idea if bread machine yeast will work okay with this recipe and what adjustments need to be made?
Hi Ray,
I have never tried bread machine yeast. Sorry dear, wont be able to help. 🙁
Would I be able to use instant yeast instead of dry active yeast for this recipe?
Yes, you can use it!
Can I use all whole wheat flour? Thank you!
Use 50% whole wheat flour and 50% all-purpose flour.
Hi, I’m not sure what you mean by this “Don’t add all the yeast mixed water at a time. Add slowly as needed”. In the video you add all the dry measure to the wet in the same bowl. Could you please clarify?
Thank you
Hi Sharon,
I have updated the written recipe. Sorry for the confusion.
My dough is so wet I can’t form it into a ball. I followed all the directions and everything happened as you described. Any ideas?
Hi Marcia,
The reason could be, Depending on how you measure the flour, quality of flour and how dry the weather is, you may need to add/less water to bring the dough the right wet and sticky consistency. If your dough is very wet after you mix it, add flour by the tablespoon until it feels perfect. Hope this helps.
I made this bread yesterday and it came out perfectly! It was such a quick and fun process. Will be making this again for sure! Thanks for sharing!
So glad to know. 😊
SO AMAZING!!! Dipping my toe into bread making and this recipe is PERFECT for a newbie with an instant pot! I’m on my third loaf it’s so fantastic and they’ve all been delicious! A bit of variation here and there just with water (as you mention) since my dough was very wet the first time but still incredibly tasty once baked on all versions. Getting ready to experiment with your noted add ons, any advice on when they should be added? I would assume same as when the rosemary and olive oil is added from the original recipe but I do see in the comments that for cheese and jalapeno to wait for the second proof.. just checking to see! THANK YOU! 🙂
Aww…. so glad to know that you are really enjoying this recipe.
Yes, add any add ons before second proofing. Hope this helps.
Hi – I made this bread at 9600 ft. Everything seemed fine and it looks and tastes fine, but it’s very crumbly, almost like focaccia so it’s hard to cut clean slices to toast or make a sandwich. Is that normal or, if not, what may have gone wrong?
Hi,
The reason could be less hydrated dough. Next time add some more water.
Can I use a slow cooker instead of instant pot? If so, warm setting on low?
Hi Liz,
I have never tried in the slow cooker so I won’t be able to help. Sorry 🙁
How does High Altitude baking factor into this recipe. I was excited when I thought the entire recipe was cooked in the InstaPot so that the air pressure was not a factor. But taking it out and then putting into another pan and baking it made me think there WILL be problems with this recipe. I live at 7,000 feet. Thanks for any advice!
No Patty! There should not be any problem.
Good recipe, easy to follow for a beginner. After 3 previous attempts at bread making, this was the first time my bread came out well, not sour-tasting or hard as a brick. The crust was beautiful too. Because I don’t have an instant pot and because I was looking for slow fermentation, I allowed the dough to proof on the counter. The only issue was that because of the current climate where I live (Pune, India), the dough doubled within 1.5 hours instead of 18 hours! Despite the unexpected quick rise, the bread came out well. (In my next attempt, reducing the amount of yeast to 1/4 tsp helped with this.) Thanks for the recipe!
If I want to try a small batch for now, can I cut ingredients to half? Do I need to adjust temp or proofing/baking time?
Thanks!
Yes, You can cut the ingredients into half, and you don’t need to adjust the temperature or baking time.
I have the Instant Pot attachment that bakes, broils, dehydrates, etc. Is it okay to use the bake feature on this to continue the process or do I need to actually fire up my oven?
Hi Lynnette,
I have never tried baking bread with the IP attachment so won’t be able to help. Really sorry.
Hi. I followed your recipe and successfully made the bread on my very first attempt. Thank you! It is so delicious. The one question I have is, if I want to times the recipe by 1.5, do you think I need to increase the time in the instant pot and increase it longer in the oven?
Hi Susan,
Sorry for the late reply. No, you don’t need to change anything.
Is is normal to have 1/2 cup of the yeast water left over? I felt if I added any more water it would almost get slimey.
Yes, it is ok. But make sure bread dough is really soft.
Hi, my dough did not rise after 4 hours. I’ve never used the yogurt setting but it seemed easy enough to set. I have a 6 qt. Any suggestions? What do you think happened?
Hi,
The reason could be
1. Expired yeast. Check the expiration of Active dry yeast.
2. Water temperature. Check the water temperature before adding the yeast. The perfect water temperature is 110 to 115. Hope this helps.
I love the flavors in this. For some reason mine doesn’t rise so beautifully. The taste is there but it’s a smaller loaf. And yes I have bubbles in the yeast and check the temp of the water when proofing. No idea. 🙁
Do you have an expiration date for how long the bread will be good for?
Bread is currently at the resting for 30 minute point, so excited to get it in the oven!!!
Can I use half Dark Rye Flour and half AP Flour. Plan on also adding rye seeds.
Hi Wilma,
Never tried with Rye Flour so no idea. So sorry!
Do you close the vent or keep it open on the instant pot?
Either way is fine. It really doesn’t matter
Can I cook this on a bread stone…
No, I dont think it will work.
This recipe is so easy and delicious! It’s or “go to” bread and I make it every week. Thank you for sharing it with all of us.
So glad to know! Thank you.
Hi
Is it possible to omit the sugar?
Thanks
Sugar is required to feed the yeast. You can reduce the amount by half.
Thank you for this recipe.
My first loaf turn out very well. It was also my first successful loaf of no-knead bread.
Today I made a second loaf with caramelised onions using 1 onion. The dough was very wet after 1st proof in the IP. It was hard to shape. Should I add more bread flour at this stage so that it is not as wet? I wasn’t sure so I just tried my best to shape it. It didn’t turn out too bad. Didn’t maintain a super round shape but the taste was good. Do you think it is possible that the onion made the dough more moist? Thanks
Hi,
My pleasure. So glad to know. 🙂
I don’t think it’s because of caramelized onion. sometimes The quality of the flour is also responsible for The excess moisture. Next time (if you are going to use the same brand of flour) reduce the amount of water a little bit. Hope this helps.
Delicious and easy bread!
This was amazing, definitely a keeper recipe! Thank you for the super clear instructions too, I can’t wait to make many more variations! ♡
So good to know! Thank you! 🙂
Wow!! This is a fantastic bread…and so simple! The first loaf lasted about 12 hrs, so I am making another right now! I used the exact amount of all ingredients and it turned out great.
Thanks for sharing this!
Cheers,
Joe
So good to know Joe. Thank you. 🙂
Hello,
I don’t have a oven. Can I bake it in my IP?
Hi, Sorry I have never tried baking in IP.
This has become my go-to IP bread recipe. I absolutely love it! I like to make as directed, and then, after the final rise when I’m slicing the top, I do a light sprinkling of coarse kosher salt on the crust. It really enhances the rosemary!
glad to know 🙂