
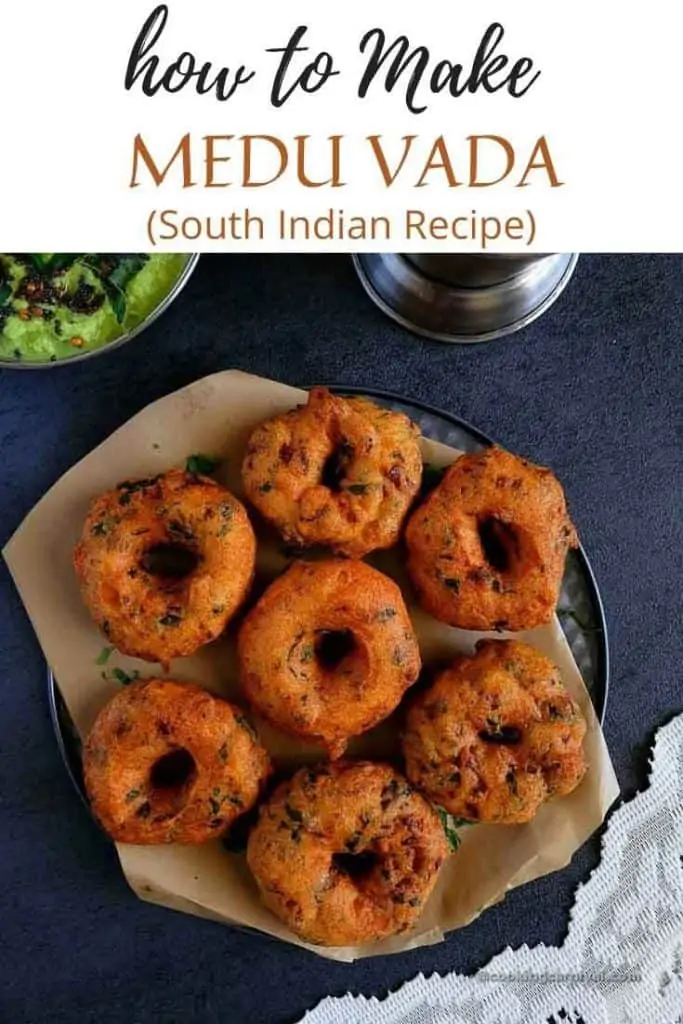
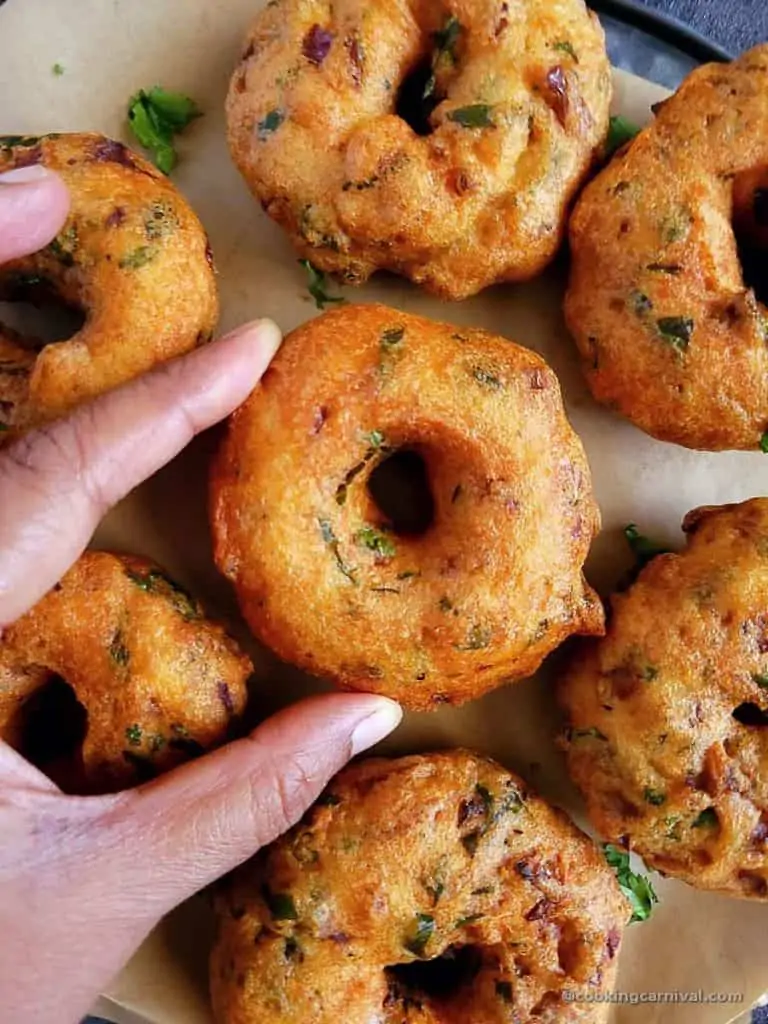
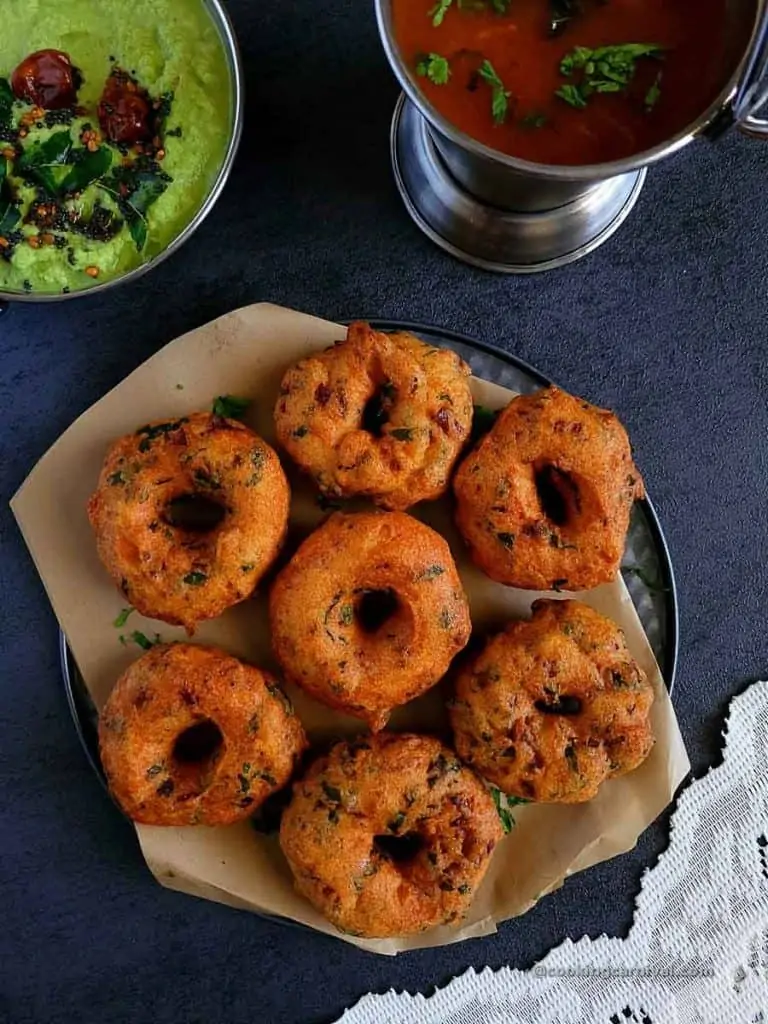
Crispy from the outside and Fluffy-soft from the inside, these vegan and gluten-free Medu Vada are the perfect breakfast or meal.
These are made with Urad dal and are usually served with sambar or rasam and coconut chutney for a hearty meal.
This is The BEST and only medu vada recipe you will ever need!! 🙂
Jump to:
I am a South Indian food lover. Idli, Rava dosa, Masala Dosa, Pongal, Uttapam, Medu Vada are some of my favorites.
It’s the Rainy season In India. We used to enjoy fried food like Kanda Bhajji, Samosa, vada pav, Pakoda, Misal, etc. a lot during this season.
The medu vada recipe tastes great during the rainy season too. Eating hot vadas during the cold weather was such an amazing feeling in India. People from India would understand these feelings.
As you might know, I live in a desert where the chances of rain are very low.
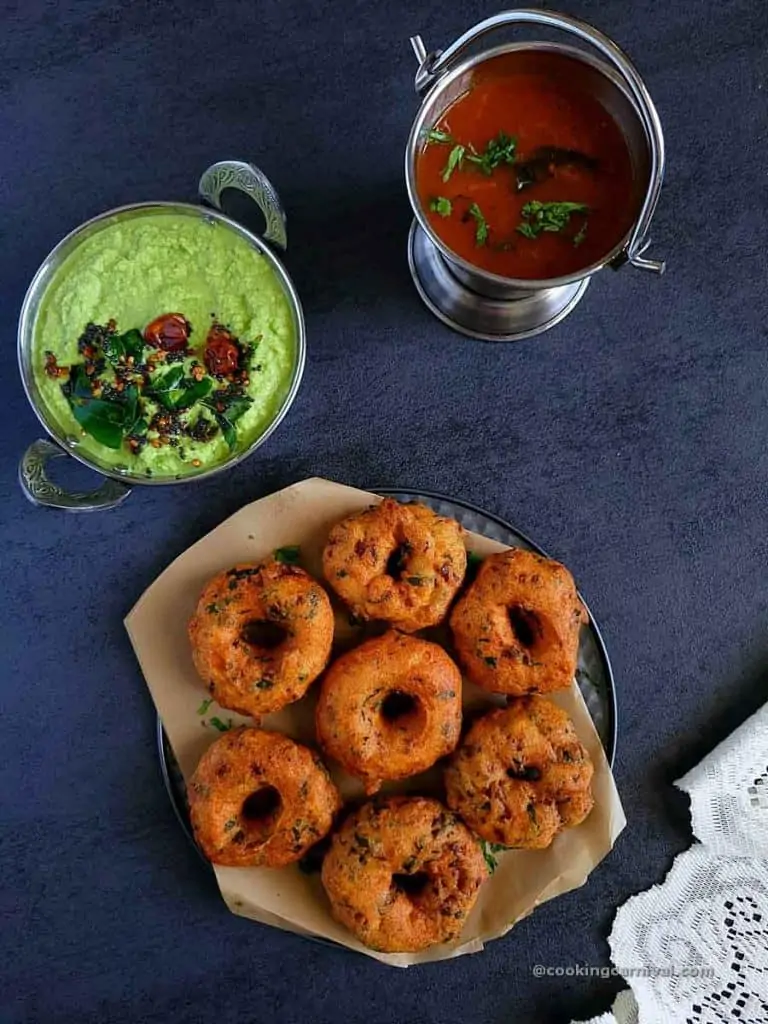
Last week there were a couple of rainy days in Arizona (lucky we are!) and we thoroughly enjoyed it with these Medu Vadas, tomato rasam, and coconut chutney.
What is Medu Vada?
Medu means Soft and Vada means Fritters. These are one of the very popular South Indian foods served for breakfast, snacks, or meals. These are also served in hotels and tiffin centers.
This vada (fritters) are deep fried and made with urad dal.
The urad dal is soaked then grind to a paste and then shaped like a donut and deep-fried.
The batter of the vada is usually flavored with cilantro, curry leaves, ginger, chilies, onion, and peppercorns.
In a way, these are very similar to the dahi Bhalla but that’s eaten as a sweet snack with curd while these medu vadas are savory. Plus while making Dahi Bhalla, we don’t add cilantro, onion, ginger, onion, curry leaves, etc.
These urad dal vadas are also known as Garelu in Andhra, Uzhunnu Vada in Kerala, and Medhu Vadai in Tamil Nadu.
These vadas are also made during festivals like Varlakshmi vrat, Gouri puja, Diwali, and Durga Navratri to offer to the deities.
My family loves Medu Vada. I especially like the crispy and fluffy medu vada dunked in hot tomato rasam with coconut chutney by the side.
The combo of Rasam vada with coconut chutney is very famous and tastes awesome. You can enjoy them with sambar too.
Traditionally wet grinder is used to make the batter however you can use a high-speed blender too. It works fine. I have shown and explained both the methods in step by step process as well as in the video.
The process of making perfect and hotel-style vadas at home is not difficult once you know the trick to get the perfect consistency of the batter and you know how to shape the vadas.
Please read the recipe with detailed tips before making this recipe to get the perfect result.
How to shape Medu Vada?
The experts just place the batter in their palms, make the hole with their thumb and drop the vada into the oil.
However, if you struggle with shaping the vadas traditional way, here are 2 ways you should follow to make it much easier without vada mould or machine.
1. On the back of Steel Bowl – This method is very very easy and so many have tried it with great success.
Take a small steel bowl. Apply some water to the backside of the bowl. Place some batter onto the bowl. Dip your index finger in water, make a hole in the center, face bowl towards the oil, drop it in the hot oil by shaking the bowl gently. Then fry them.
2. On plastic wrap or parchment paper –
Take a parchment paper or cling wrap and place it on a flat bottom. Then apply some oil to the plastic sheet. Wet your hands with water and take some of the batters and place it on the greased sheet. Use your index finger and make a hole in the center of the vada. Now, carefully lift the vada from the sheet, place the vada in hot oil and fry them.
You can use Vada maker too, it is easily available in Most Indian stores as well as on Amazon. Or simply drop the vada (just like any other fritters/bhajji) without shaping them.
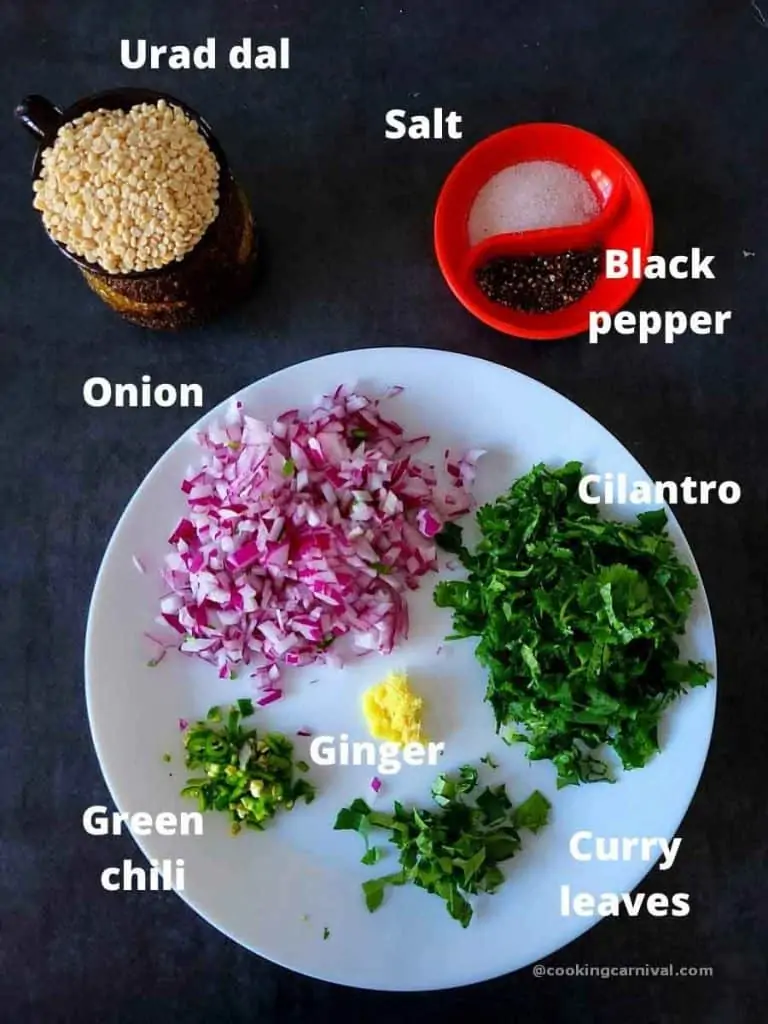
Ingredients required
Urad Dal – Good quality of Urad dal is required for this recipe. You can use Whole skinless or split & dehusked black gram lentil (urad dal). Both work fine for this recipe. Make sure the Urad dal is no too old. Old dal that has been lying in the stores or your pantry for long makes the vada batter.
Salt – Be sure to add after grinding the batter.
Black peppercorn – gives a nice aroma and taste to the vada. I have used coarsely crushed black pepper as we don’t like whole black pepper. If you like, you can add the whole peppercorn. You can skip it too.
Aromatics – I have also added onions, curry leaves, cilantro, green chilies, and ginger to make it a restaurant-style vada. You can skip any or all the aromatics. But I highly recommend adding them. Gives great texture and taste to the vadas.
Oil – Any oil will work here for frying the vadas.
How to make this recipe? Step by step process
Step 1 – Rinse and soak the Dal
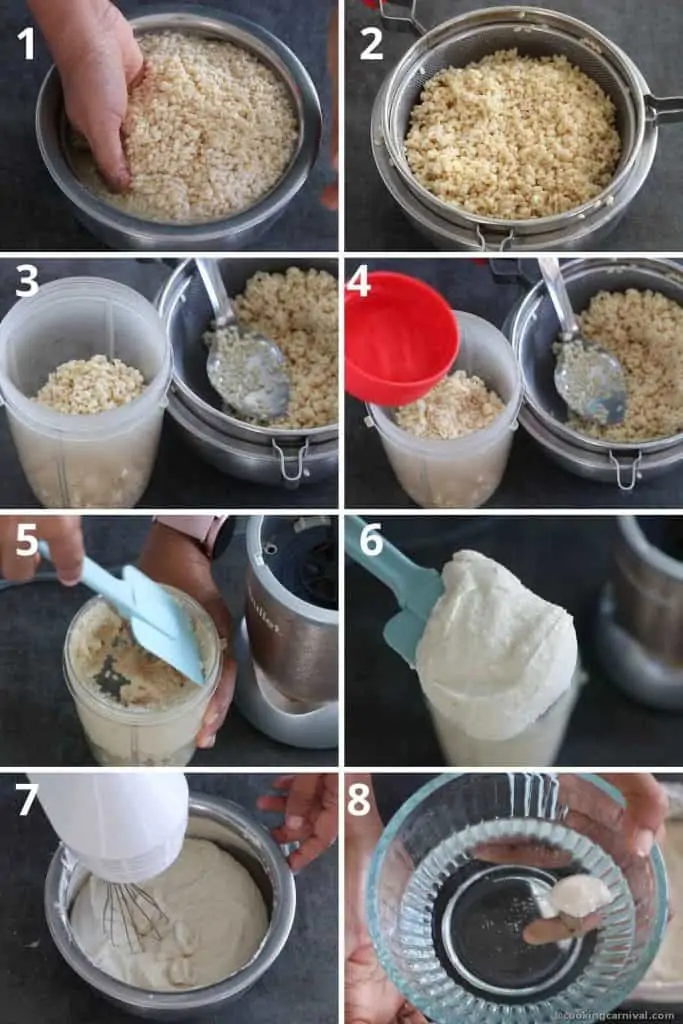
Rinse urad dal under running water. Then soak it in 3 cups of water for 5 to 6 hours. (image 1)
Tip – Don’t soak the dal for more than 6 hours.
After 6 hours, the dal would have increased the size. Once soaked, drain all the water. (image 2)
Step – 2 Grind the batter
In blender
Add the soaked urad dal to a grinder jar. Add 2 to 3 tablespoons ice-cold water or as required. Grind it till the batter looks fluffy and thick. You can grind in parts and add water as required. Just make sure that not to make the batter very thin. In total, I have used around 6 tablespoon of water. The water to dal ratio is depended on the quality of the dal you use. (Image 3 to 6)
Tip – Use ONLY ice-cold water for grinding the batter. Always scrape the sides and the bottom to release the dal that is stuck in the jar. Make sure your blender does not become warm or hot while you grind the dal.
Transfer this to the large bowl. Now, using the wire whisk attachment of your hand mixer or using your clean hands, whip the batter for 2 minutes on medium speed. This process is very important. It will create aeration and will help you get the fluffy, soft, and light vadas. (image 7)
You will notice the batter is increased in volume and also became lighter in color.
Tip – To test if the batter is well aerated and ready to fry, drop a small portion of the batter in a bowl full of water. If it floats, it means the batter is well aerated and ready to fry. If it sinks, means you need to beat the batter for some more time. Read the notes below on what to do if the medu vada batter becomes thin and runny. (image 8)
In wet grinder
Turn on the wet grinder with ¼th cup of water. Add the urad dal slowly into the running wet grinder.
Let the dal grind for 15 to 20 minutes. Every 5 minutes scrape the wet grinder with a spatula.
Carefully add a tablespoon of water only if needed. If the batter becomes runny vadas cannot be shaped. Add water if needed until the batter is light and has the consistency of a stiff whipped cream. For my urad dal, I used exactly ¾ cup of water which I added in gradually.
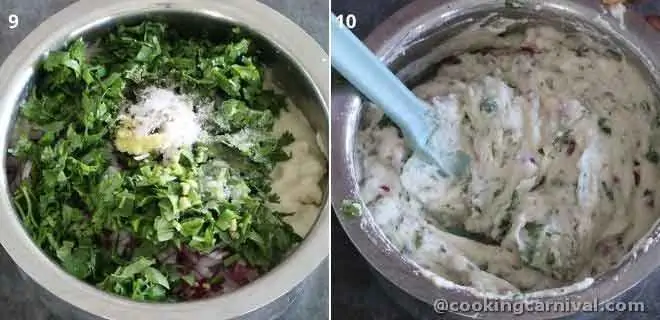
Take out the batter into a wide bowl. Add onion, cilantro, green chilies, curry leaves, ginger, coarsely crushed black pepper, and salt. (image 9)
Mix everything well. (image 10)
Heat oil in a Kadai on medium heat.
Step – 3 Shaping and frying the vada
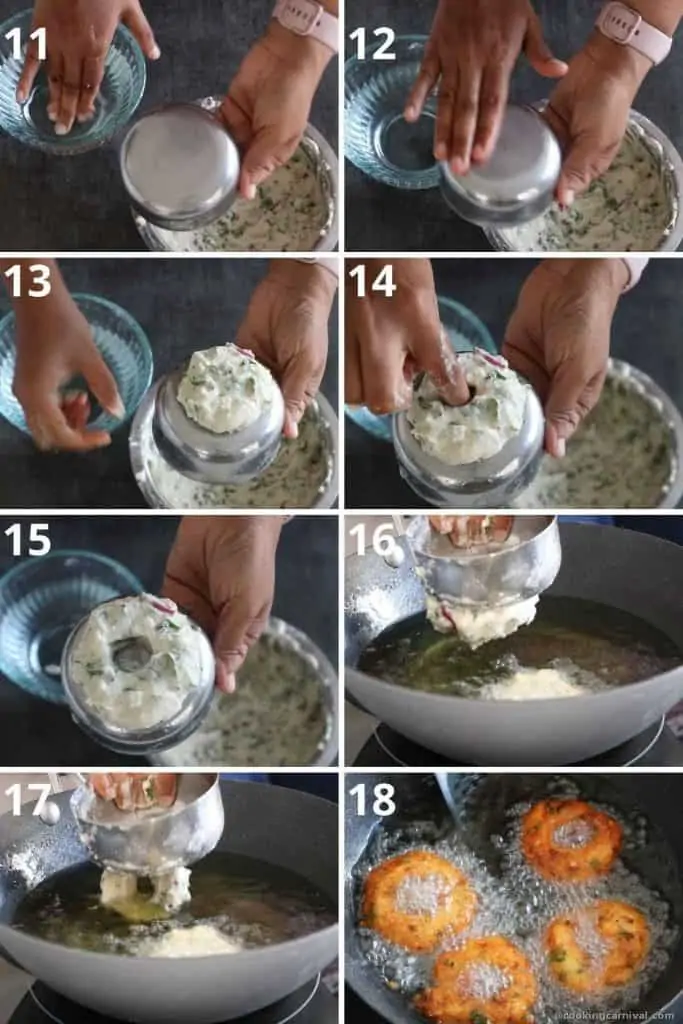
To shape the vada, keep the bowl of water handy. Take a small steel bowl. Dip your hand generously into the water. (image 11)
Wet the backside of the bowl with some water. (Refer to a video) (image 12)
Place some batter onto the bowl. Dip your index finger in water, and make a hole in the center of the batter. (image 13 to 15)
Face bowl towards the oil, drop the vada in the hot oil by shaking the bowl gently. Because of the water, it will easily slide off from the bowl. Please ensure there is no excess water dripping from your bowl. (image 16 and 17)
Fry Vada from both sides to golden brown in medium hot oil. Do flip them now and then for even browning. Take them out over a paper towel to drain access oil. (image 18)
Repeat the same process with the remaining batter and fry all the vadas.
(note – I have shared one more easy method of shaping the vada in the recipe card.)
Once they are golden brown, take them out of the oil using a perforated spatula. Drain on a paper towel.
Repeat the same process and shape all the vada from the remaining batter and fry them.
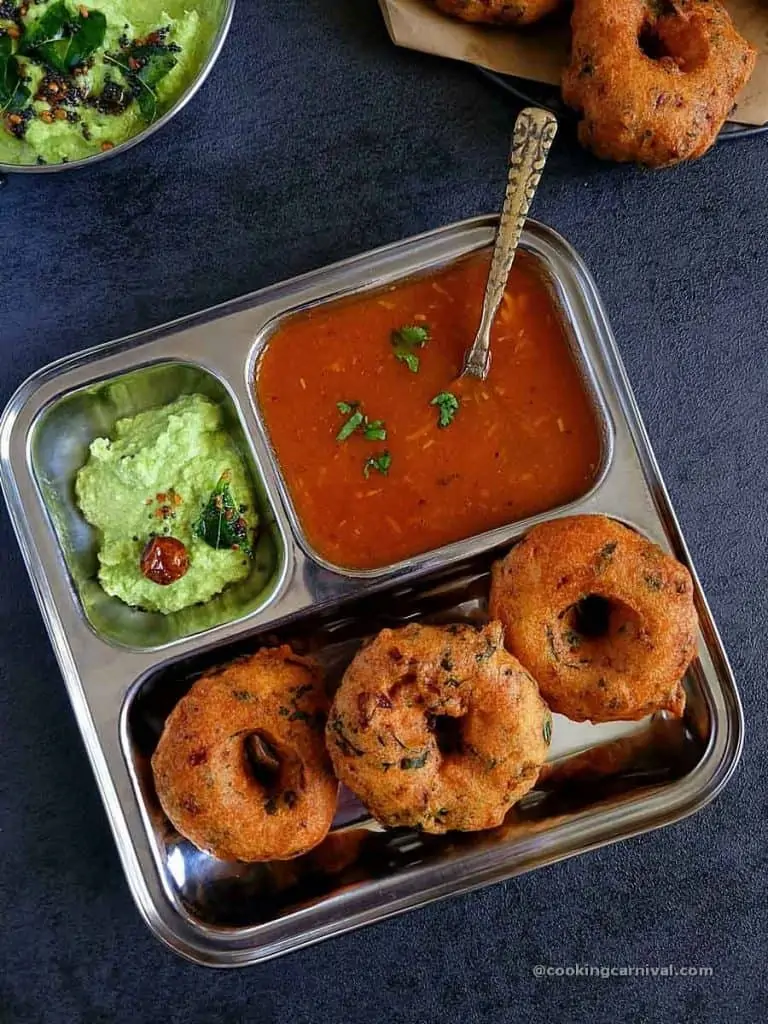
Serve it with Hot rasam or Sambar and coconut chutney.
Notes, Pro-tips, and quick FAQs
- Try to use good quality urad dal for the good texture of your vadas.
- Don’t add too little or too much water while grinding the urad dal. Too little water will result in hard vada and using too much water will make it difficult to shape them before frying and it will make vadas very oily.
- The consistency of the batter should be that of a stiff whipped cream.
- Dip your palm every time in the water to avoid the batter sticking to the palm.
- Add salt, peppercorn, onions, cilantro, curry leaves, ginger, and green chilies right before frying the medu vada to avoid runny batter.
- Add a couple of tablespoons of sooji or rice flour if your batter is runny.
- Deep fry your vadas on medium heat for best results. Make sure to use very little ice-cold water to grind the batter. Don’t use more than 2 teaspoon at one time.
- Always Fry vada over medium heat. Not on high heat. If the oil is very hot, the vada will not cook through.
- If you are making medu vada for pooja, add the only salt and skip adding other ingredients.
- Shaping the vada is difficult for you? Then just drop the spoonful of batter in hot oil to make simple round vada just like dahi vada.
If the vada turns out chewy and hard, the reasons could be
Dal is very old stock.
Not soaking dal for at least 5 hours.
the batter is not ground correctly.
Did not use enough water while grinding or did not aerate the batter well after grinding the dal.
The reasons could be
Oversoaking the dal
Over grinding the dal
Used too much water while grinding the dal and Loose batter consistency.
The traditional South Indian breakfast, medu vada is usually served with coconut chutney, onion chutney, peanut chutney, or green coconut chutney and sambar or rasam.
The batter can be stored in the refrigerator for a day or two.
The fried medu vada can be stored in the refrigerator in an airtight container for 2-3 days. Reheat in the microwave.
You can Freeze the fried vada for 2-3 months when stored in an air-tight container.
Chutney recipes to serve with Medu vada
- Green Coconut Chutney | Mint Coconut Chutney
- Minty Raw Mango Chutney
- Peanut Chutney
- Onion Chutney
- Allam Pachadi
Have you tried this Recipe? Please feed us with your feedback, ★ star ratings, and comments below.
You can also FOLLOW me on FACEBOOK, INSTAGRAM, and PINTEREST for more fabulous recipes and updates.
Subscribe to our YouTube Channel for tasty and easy video recipes.

Medu Vada
Ingredients
- 1 cup Urad Dal split & de-husked black gram lentil
- ¼ teaspoon Salt or to taste
- 10 Black peppercorns Crushed coarsely
- ⅓ cup onion, chopped
- ¼ cup cilantro, chopped
- 1 teaspoon green chilies, chopped
- ½ teaspoon grated ginger
- 5 curry leaves, chopped
- Oil for frying
Instructions
Step 1 – Rinse and soak the Dal
- Rinse urad dal under running water. Then soak it in 3 cups of water for 5 to 6 hours.Tip – Don’t soak the dal for more than 6 hours.
- After 6 hours, the dal would have increased the size. Once soaked, drain all the water.
Step – 2 Grind the Dal
Batter in blender
- Add the soaked urad dal to a grinder jar. Add 2 to 3 tablespoons ice-cold water or as required. Grind it till the batter looks fluffy and thick. You can grind in parts and add water as required. Just make sure that not to make the batter very thin. In total, I have used around 6 tablespoon of water. The water to dal ratio is depended on the quality of the dal you use.Tip – Use ONLY ice-cold water for grinding the batter. Always scrape the sides and the bottom to release the dal that is stuck in the jar. Make sure your blender does not become warm or hot while you grind the dal.
- Transfer this to the large bowl. Now, using the wire whisk attachment of your hand mixer or using your clean hands, whip the batter for 2 minutes on medium speed. This process is very important. It will create aeration and will help you get the fluffy, soft, and light vadas.
- You will notice the batter is increased in volume and also became lighter in color.Tip – To test if the batter is well aerated and ready to fry, drop a small portion of the batter in a bowl full of water. If it floats, it means the batter is well aerated and ready to fry. If it sinks, means you need to beat the batter for some more time. Read the notes below on what to do if the medu vada batter becomes thin and runny.
Batter in wet grinder
- Turn on the wet grinder with ¼th cup of water. Add the urad dal slowly into the running wet grinder.
- Let the dal grind for 15 to 20 minutes. Every 5 minutes scrape the wet grinder with a spatula.
- Carefully add a tablespoon of water only if needed. If the batter becomes runny vadas cannot be shaped. Add water if needed until the batter is light and has the consistency of a stiff whipped cream. For my urad dal, I used exactly ¾ cup of water which I added in gradually.
- Take out the batter into a wide bowl. Add onion, cilantro, green chilies, curry leaves, ginger, coarsely crushed black pepper, and salt.
- Mix everything well.
- Heat oil in a Kadai on medium heat.
Step – 3 Shaping and frying the vada
Method – 1
- To shape the vada, keep the bowl of water handy. Take a small steel bowl. Dip your hand generously into the water.
- Wet the backside of the bowl with some water. (Refer to a video)
- Place some batter onto the bowl. Dip your index finger in water, and make a hole in the center of the batter.
- Face bowl towards the oil, drop the vada in the hot oil by shaking the bowl gently. Because of the water, it will easily slide off from the bowl. Please ensure there is no excess water dripping from your bowl.
- Fry Vada from both sides to golden brown in medium hot oil. Do flip them now and then for even browning. Take them out over a paper towel to drain access oil.
- Repeat the same process with the remaining batter and fry all the vadas.
Method – 2
- Place a small piece of plastic sheet or parchment paper on a flat surface, grease it lightly with oil.
- Then wet your hands with water and then take some batter into your palm.
- Transfer the batter onto the greased plastic sheet. Using your thumb, make a hole in the center to give the donut shape vada.
- Lift the side or corner part of the sheet with one hand and transfer the vada onto your other hand’s fingers.
- Face your palm towards the oil, drop in the hot oil by shaking your fingers gently. Be careful while dropping the vada in hot oil. Don’t drop them from the high.
- Fry the vada on a medium flame till they turn golden and crisp. The oil should be medium hot, if it’s too hot the vada will not cook from inside and remain raw and become golden brown from outside.
- Once they are golden brown, take them out of the oil using a perforated spatula. Drain on a paper towel.
- Repeat the same process and shape all the vada from the remaining batter and fry them.
- Serve it with Hot rasam or Sambar and coconut chutney.
Video
Notes
- Try to use good quality urad dal for the good texture of your vadas.
- Don’t add too little or too much water while grinding the urad dal. Too little water will result in hard vada and using too much water will make it difficult to shape them before frying, making vadas very oily.
- The consistency of the batter should be that of a stiff whipped cream.
- Dip your palm every time in the water to avoid the batter sticking to the palm.
- Add salt, peppercorn, onions, cilantro, curry leaves, ginger, and green chilies right before frying the medu vada to avoid runny batter.
- Add a couple of tablespoons of sooji or rice flour if your batter is runny.
- Deep fry your vadas on medium heat for best results. Make sure to use very little ice-cold water to grind the batter. Don’t use more than 2 teaspoon at one time.
- Always Fry vada over medium heat. Not on high heat. If the oil is very hot, the vada will not cook through.
- If you are making medu vada for pooja, add the only salt and skip adding other ingredients.
- If shaping the vada is difficult for you then just drop the spoonful of batter in hot oil to make simple round vada just like dahi vada.
- For quick FAQs, read the blog pose above the recipe card.
- The calorie per serving doesn’t include oil.
- This recipe is updated with new content, pics, and video, originally published in Sept. 2015
Nutrition
Warm Regards,
Dhwani.

Motivating tips getting. Thanks for the effort.
Thanks Rita Desai!!! 🙂
Very nice idea dear
Thank you!
Nice tip.. Thankyou so much.. I like it very much.. Can u tell me where do u get dat ladder…
Thanks Sowmya. I got it from India.
very easy and useful tips
Thanks Jyoti. 🙂
Thanks for the recipe it comes out absolutely perfect. Great
Thanks Upma. glad you liked this method. If you have picture by any chance, you can send us by email or share with us on our facebook page https://www.facebook.com/cookingcarnival/.
Very very eady to make n safe also !! Thanks a TON !!??
Thanks a lot Radha. Glad you found this method useful. 🙂
I tried it but my vadas sticks on the bowl. What to do? ??
Hi Shilpi,
How was batter consistancy?? Did you apply water on bowl first???
Great recipe will try it for sure
Thanks Navnish. 🙂
I tried this trick today and the medhuvadas turned out very pretty😊. Usually I use both hands to shape the vadas. This technique was far less messy and safe. Thank you so much for sharing ❤
So glad to hear. Thank you!